Using Live Search
SELECT
    name AS application_name,
    version,
    publisher,
    install_date,
    install_location
FROM programs
ORDER BY name;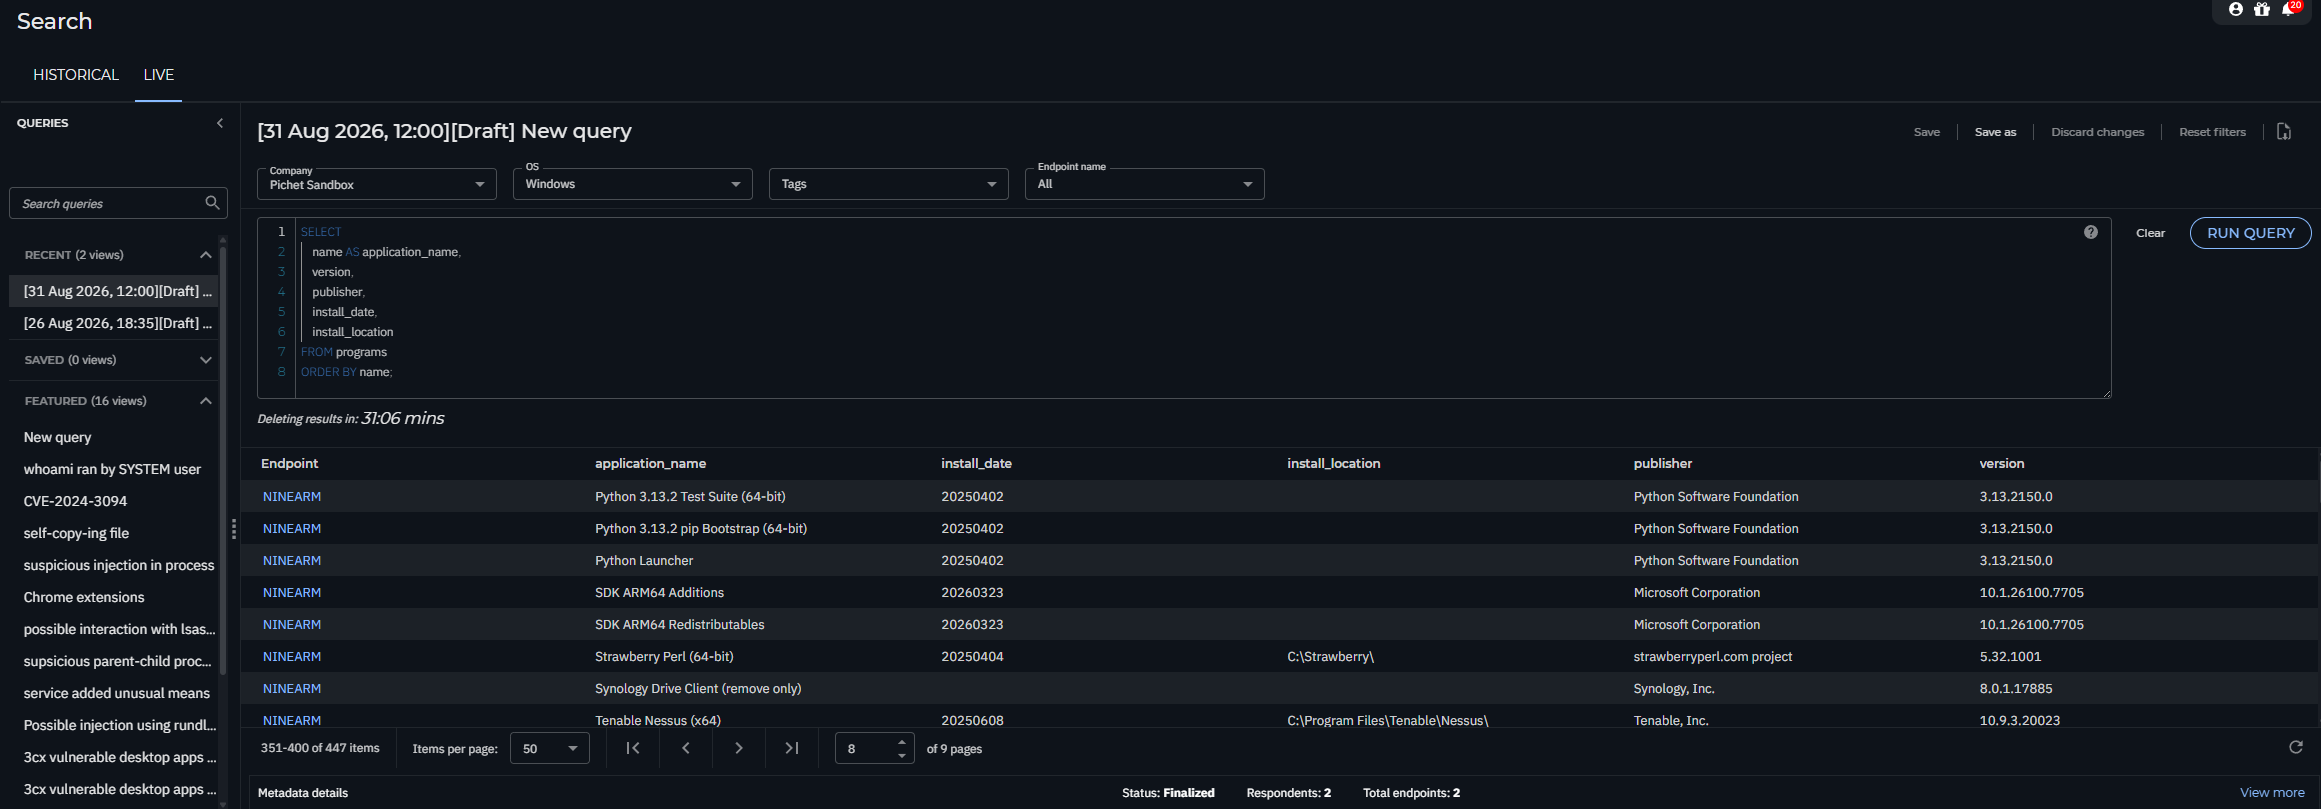

Using Live Search
SELECT
name AS application_name,
version,
publisher,
install_date,
install_location
FROM programs
ORDER BY name;You can download here
Windows
https://github.com/darklite404/Bitdefender_Gravityzone/blob/main/BESTagentnetworkcheckMay2026.ps1
Linux
https://github.com/darklite404/Bitdefender_Gravityzone/blob/main/BESTagentnetworkcheckMay2026.sh
using data for May 2026
To run
Set-ExecutionPolicy -Scope Process -ExecutionPolicy Bypass
.\BESTagentnetworkcheckMay2026.ps1

log will show what is the error

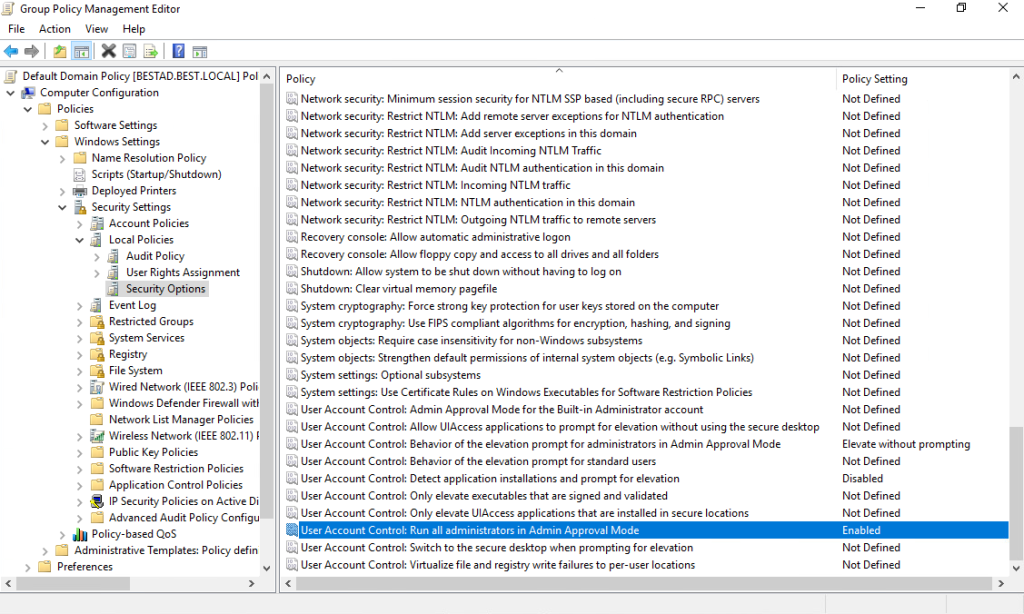
Setting this
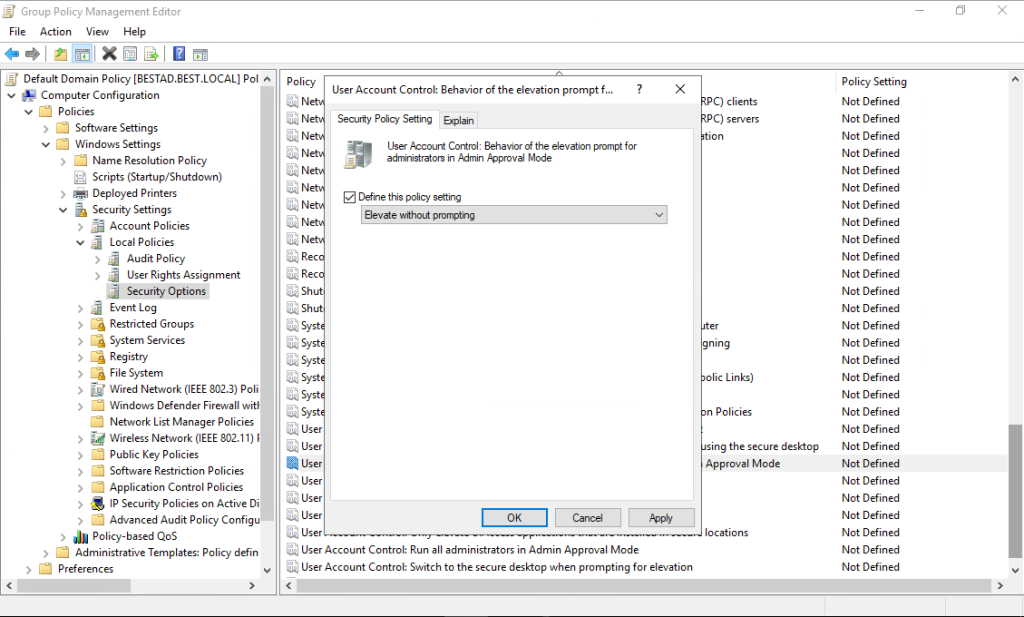
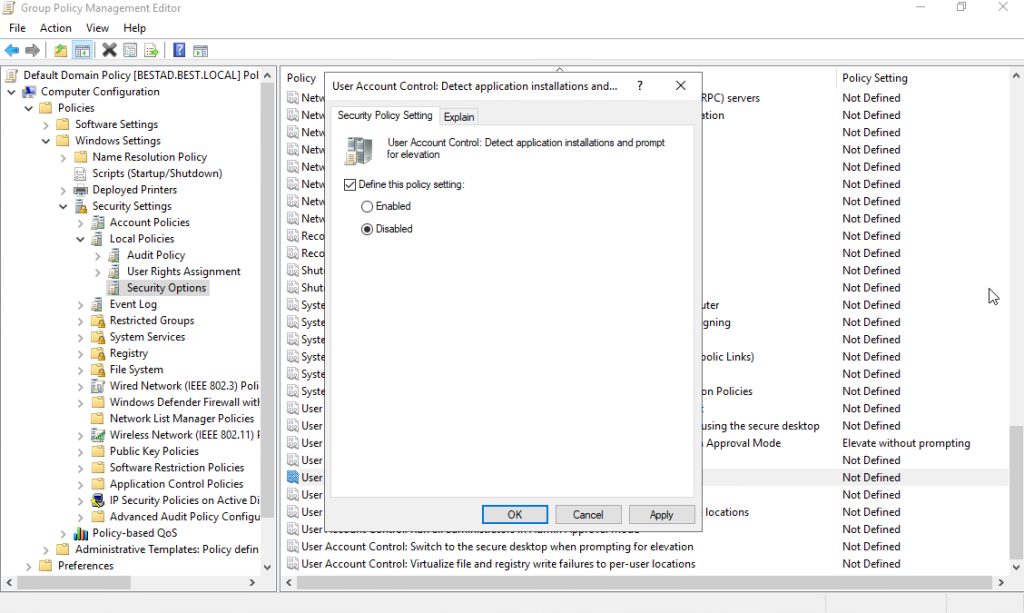
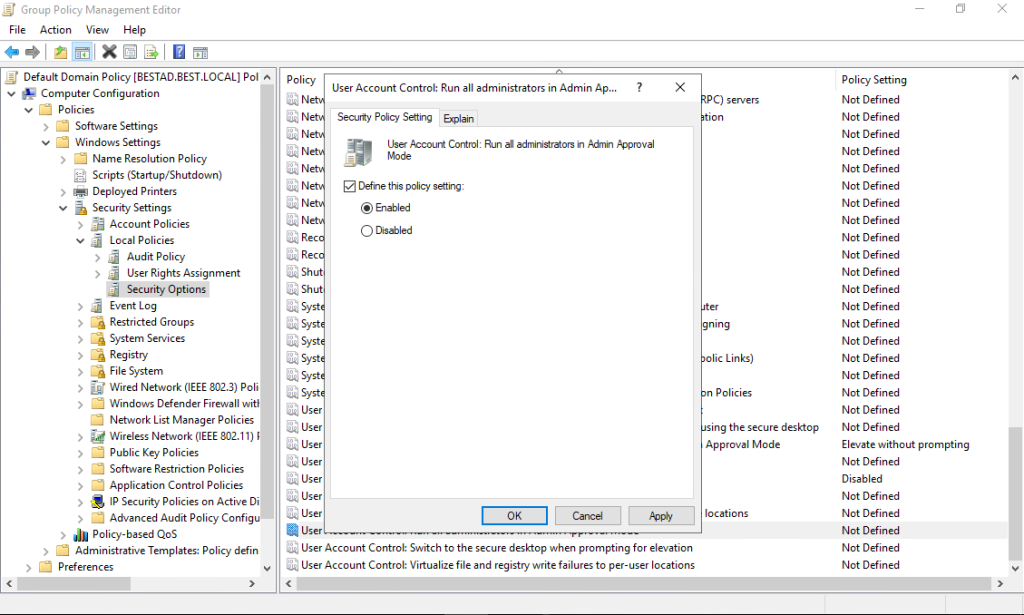
Then https://www.bitdefender.com/business/support/en/77209-157497-install-security-agents—standard-procedure.html#id337204
For Active Directory machines use these syntaxes: username@domain.com and domain\username. To make sure that entered credentials will work, add them in both forms (username@domain.com and domain\username).
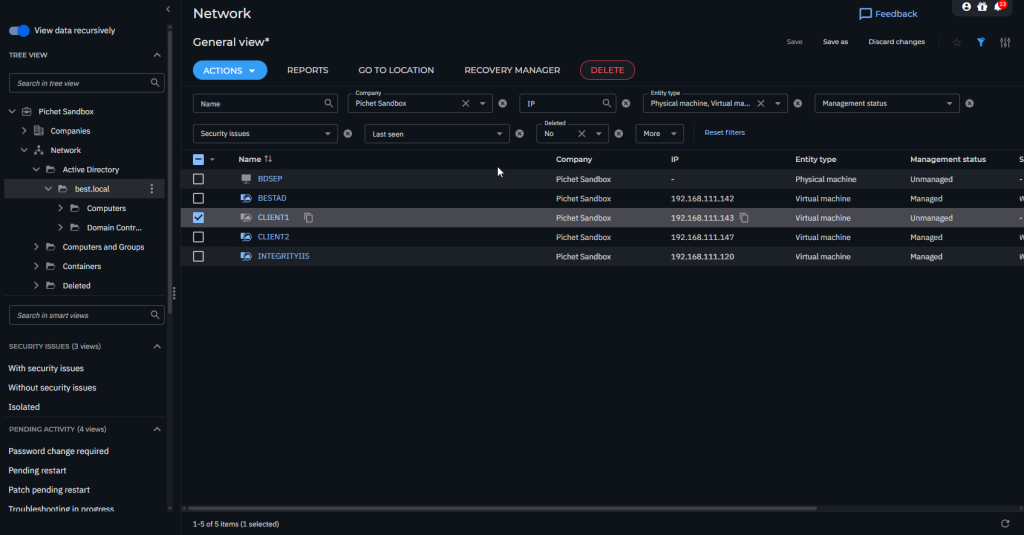


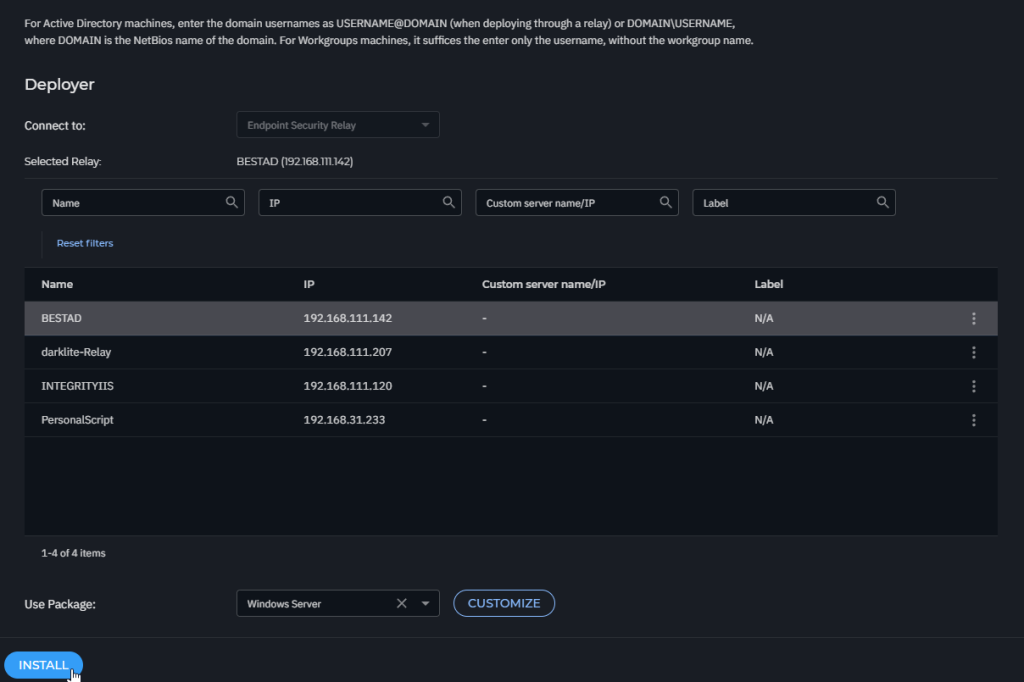
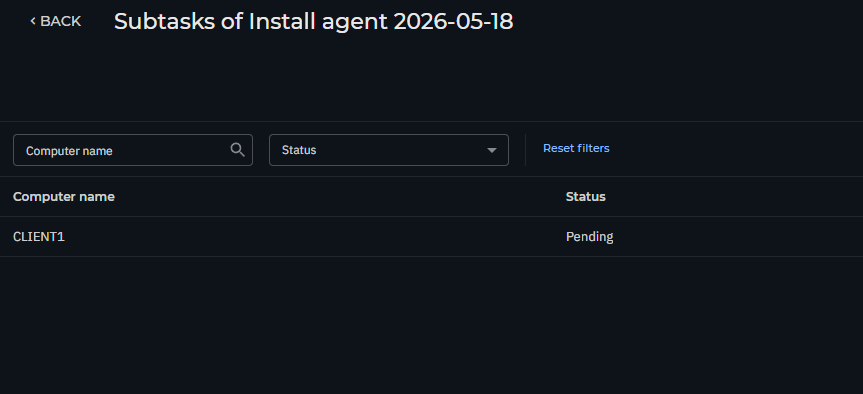

Macro can be block by
Fileless Attack Defense if it trigger powershell.exe

Fix by
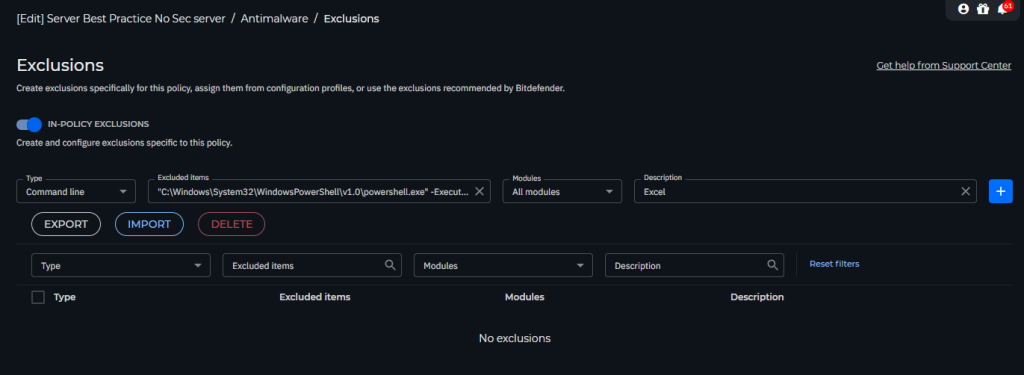
add command in Exclusions such as below command
"C:\Windows\System32\WindowsPowerShell\v1.0\powershell.exe" -ExecutionPolicy Bypass -WindowStyle Hidden -Command "Get-Process EXCEL .......... | Stop-Process -Force"
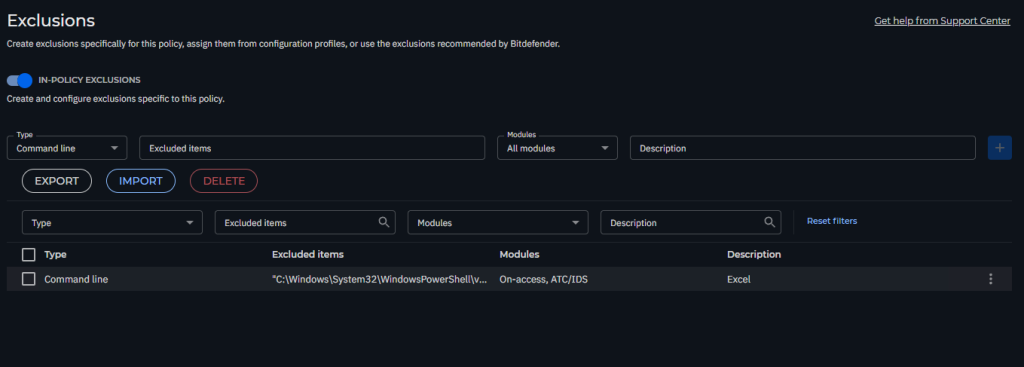
Then when it execute this command it will not blocked again.
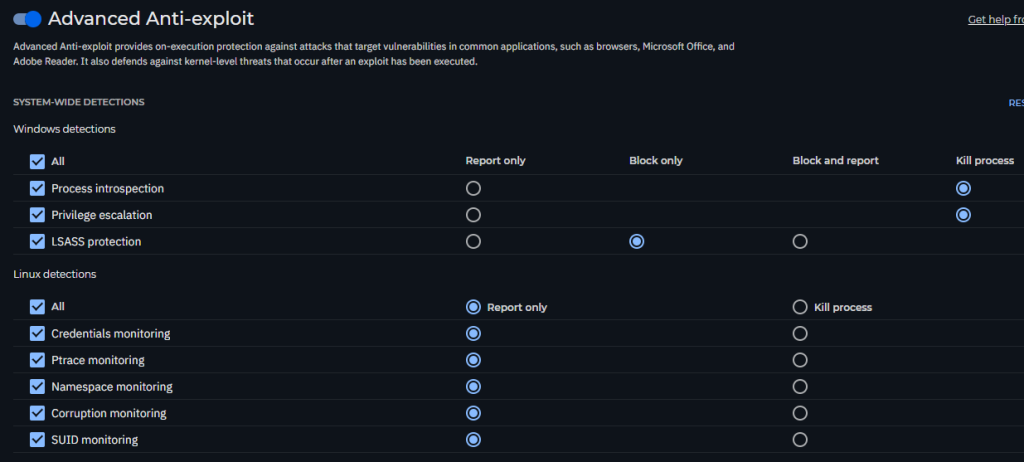
Advance Anti Exploit

Fixed by
Go to Policy > Antimalware > Advance Anti-Exploit
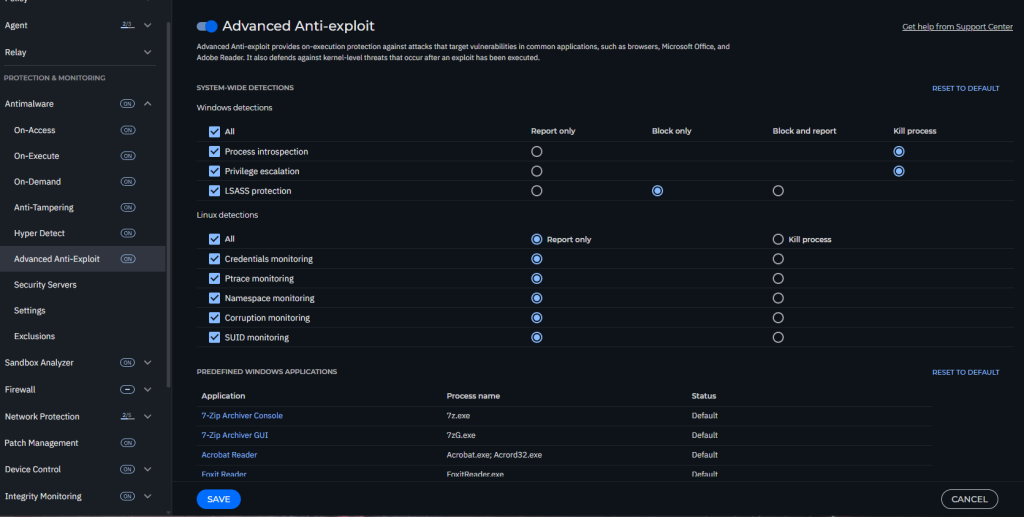
then Find
| Microsoft Office, Microsoft Excel | Excel.exe |

Add to report only for what it trigger in Incidents
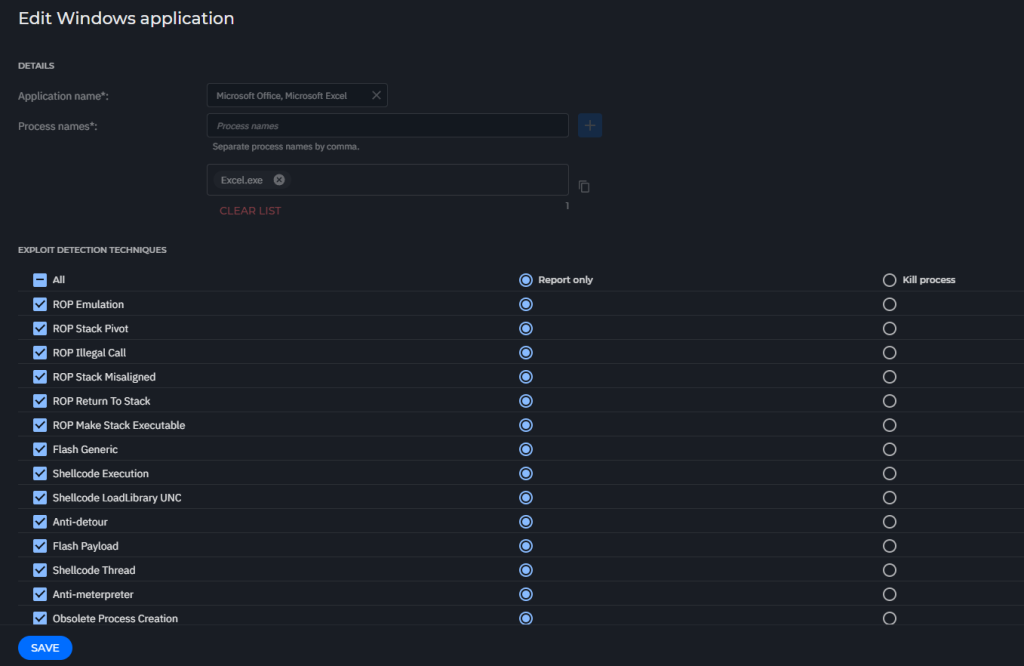
then save the policy
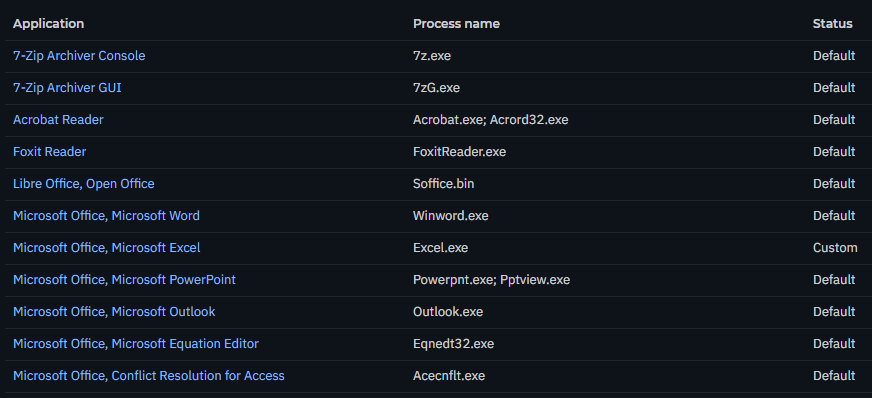
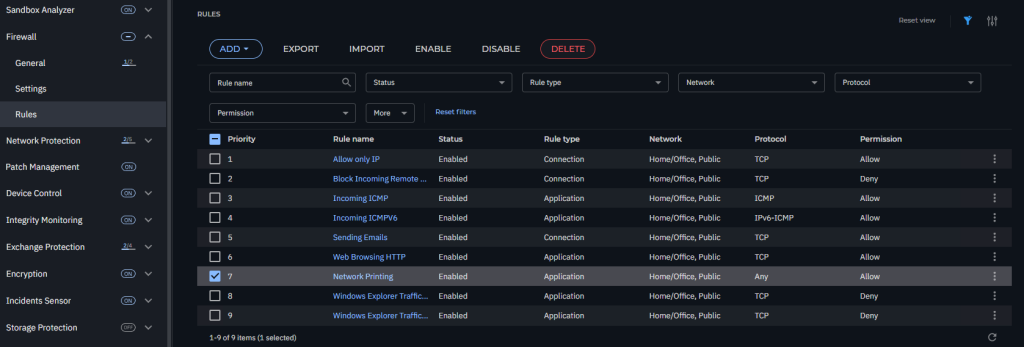
In Firewall > Rule
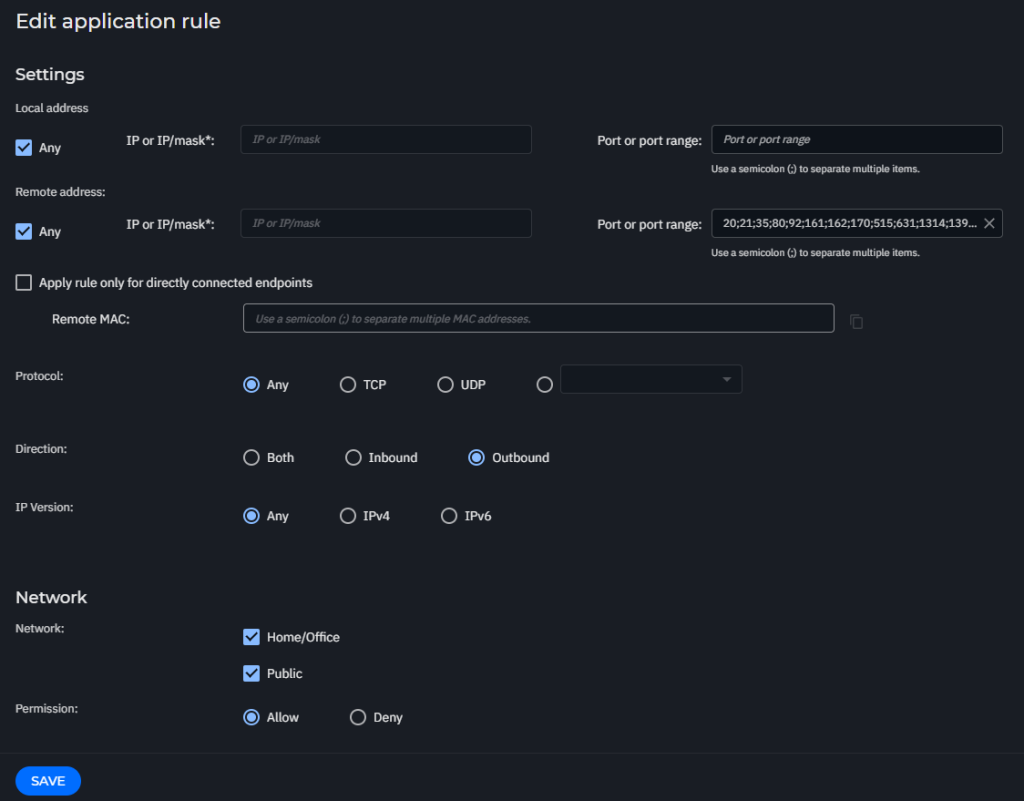
Edit rule > Allow
Enable Rule
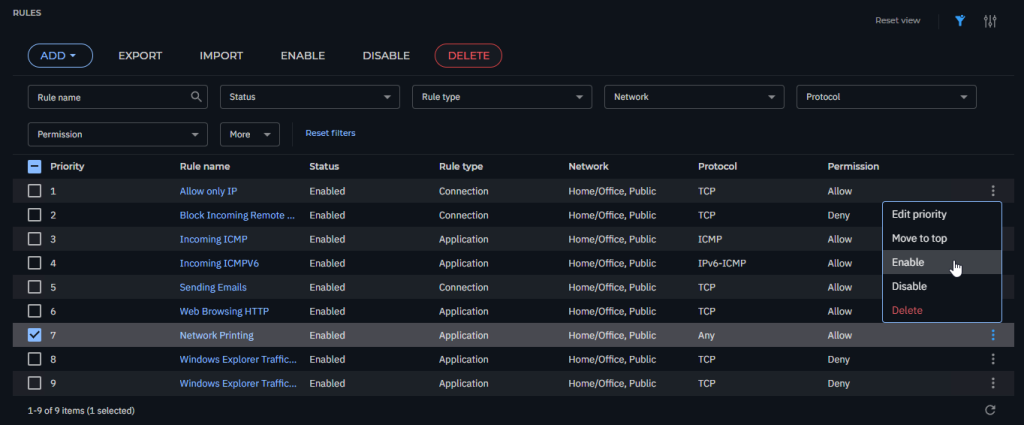
That it !!!
As I got Lots of request on How to PoC EDR
then this is my write up
we will use this Github to test
https://github.com/redcanaryco/invoke-atomicredteam/wiki/Installing-Invoke-AtomicRedTeam
First add exclusion on Gravityzone to C:\AtomicRedTeam

Open Powershell to create folder
mkdir C:\AtomicRedTeam
cd C:\AtomicRedTeam
Install moduleInstall-Module -Name invoke-atomicredteam,powershell-yaml -Scope CurrentUser
ANSWER Y
ANSWER A
Then download all test script
IEX (IWR 'https://raw.githubusercontent.com/redcanaryco/invoke-atomicredteam/master/install-atomicredteam.ps1' -UseBasicParsing);
Install-AtomicRedTeam -getAtomics
Checking script by
Invoke-AtomicTest All -ShowDetailsBrief
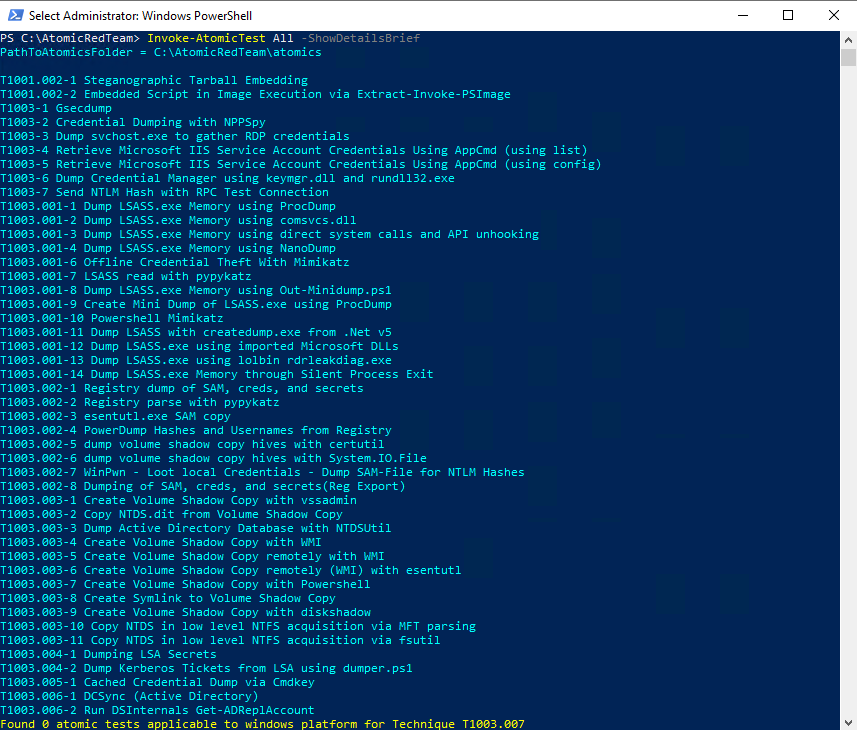
then
start test with to test all T1003 InteractivelyInvoke-AtomicTest T1003 -Interactive
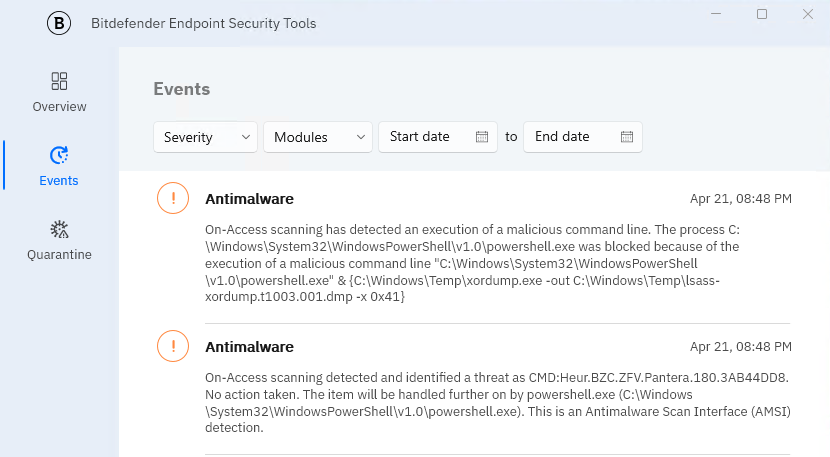
but you can see Bitdefender Agent Already block it
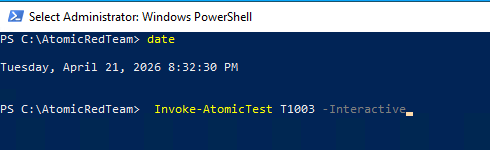
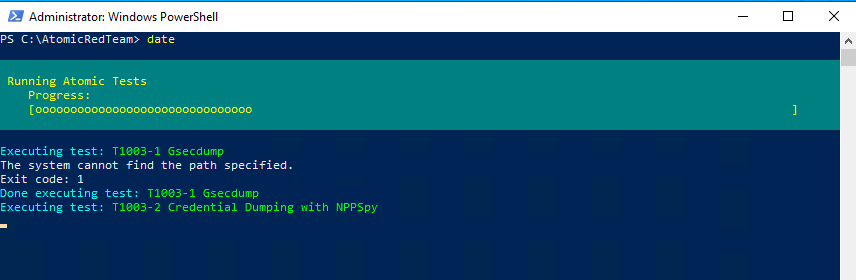


Invoke-AtomicTest T1003.001 -Interactive



Prerequisite For Windows 7 Service Pack 1
download here
or https://aka.ms/vs/17/release/vc_redist.x86.exe
/////////////////////////////////////////////////////////////////////////////////////////////////////////////
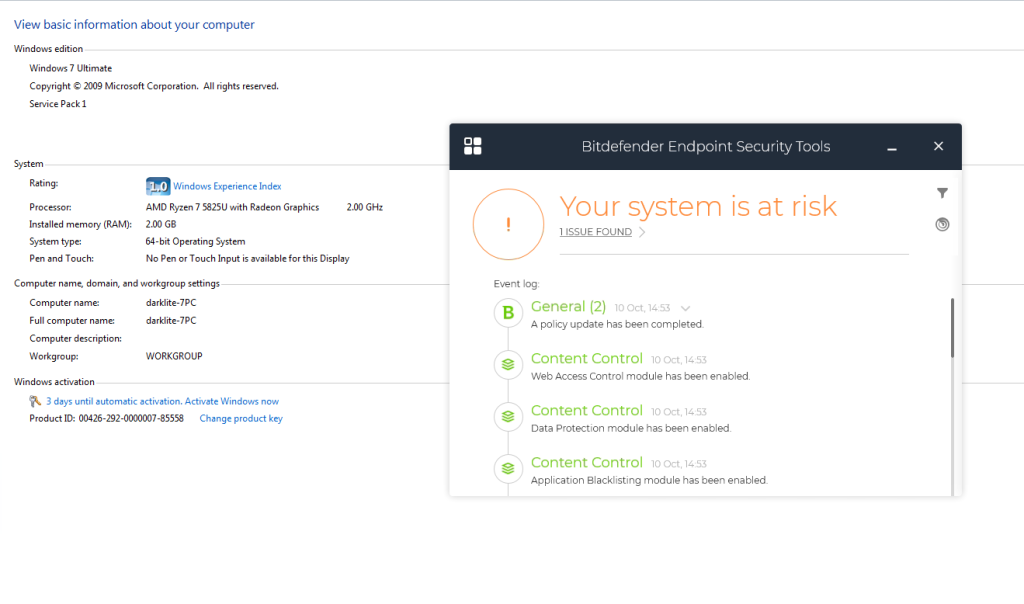
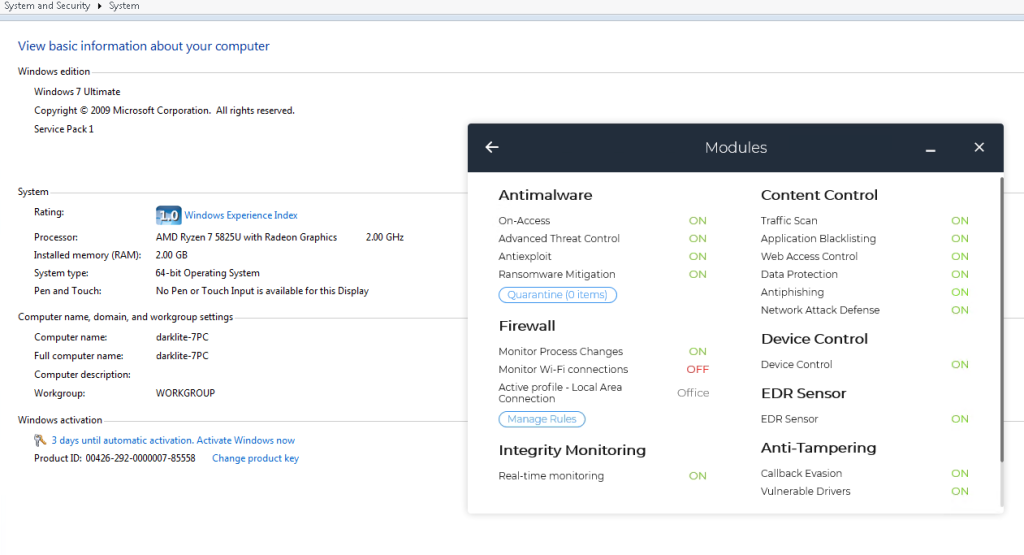
ONLY IF you are using Windows 7 need to install these patch
KB3033929
KB4490628
KB4474419
KB4536952
KB4534310
/////////////////////////////////////////////////////////////////////////////////////////////////////////////
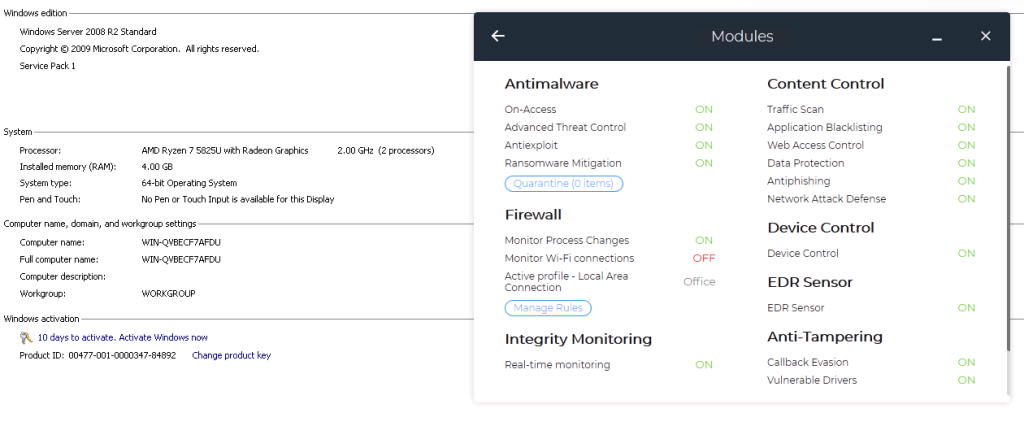
Prerequisite For Windows server 2008r2
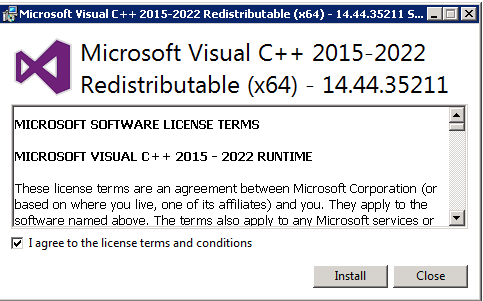
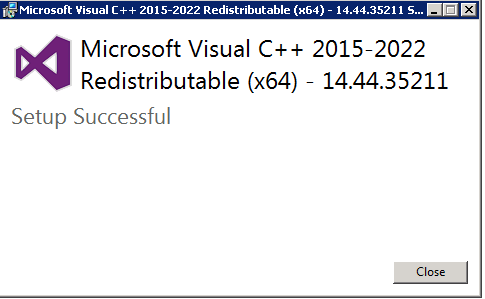
or https://aka.ms/vc14/vc_redist.x64.exe


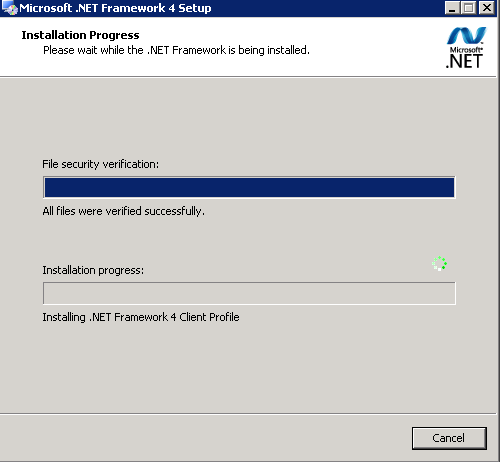
http://microsoft.com/en-us/download/details.aspx?id=17718


https://www.microsoft.com/en-us/download/details.aspx?id=46083
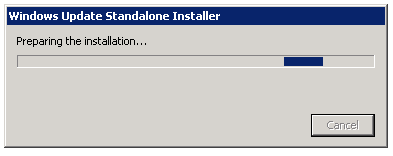
Or If you cannot download with that link you can check at github
https://github.com/darklite404/Bitdefender_Gravityzone/tree/main/Windows2008R2
To set up a Jira integration, follow these steps:
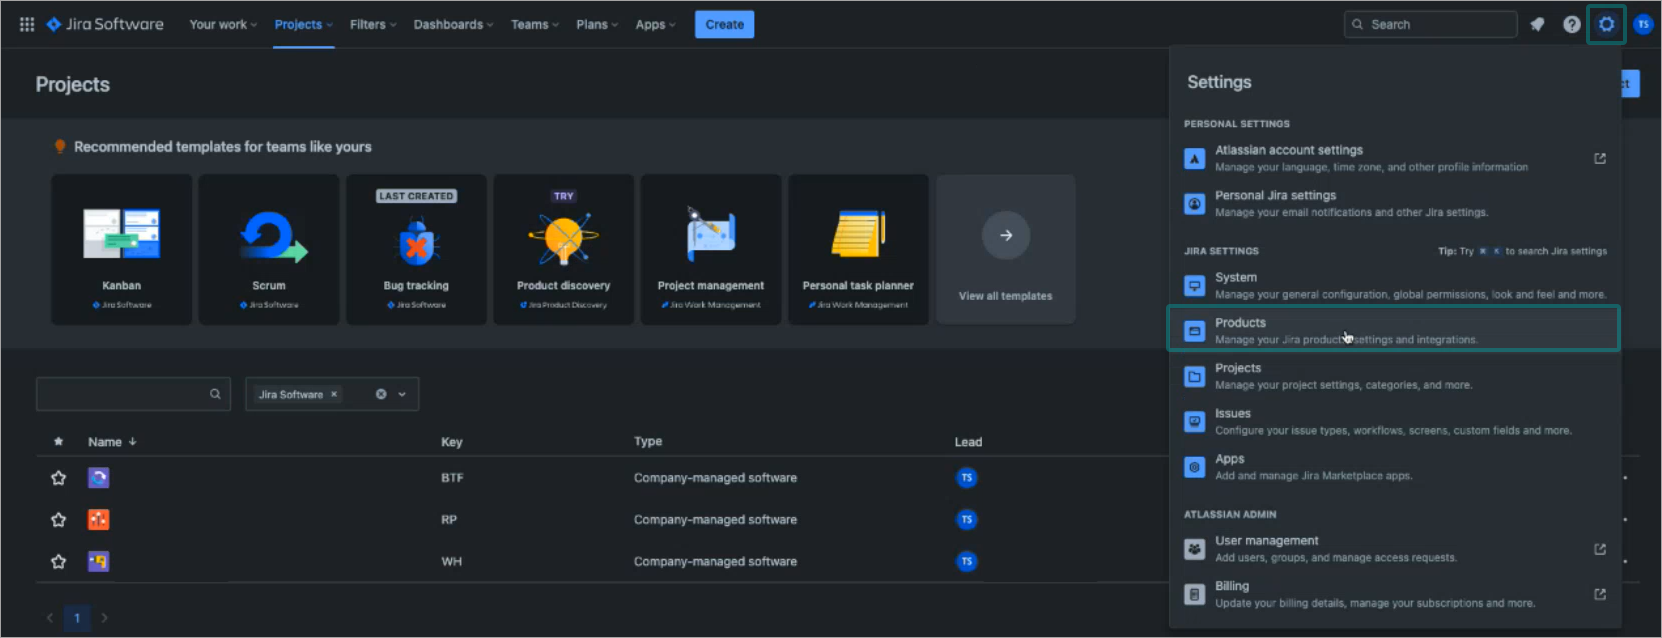 The Jira Software configuration page is displayed.
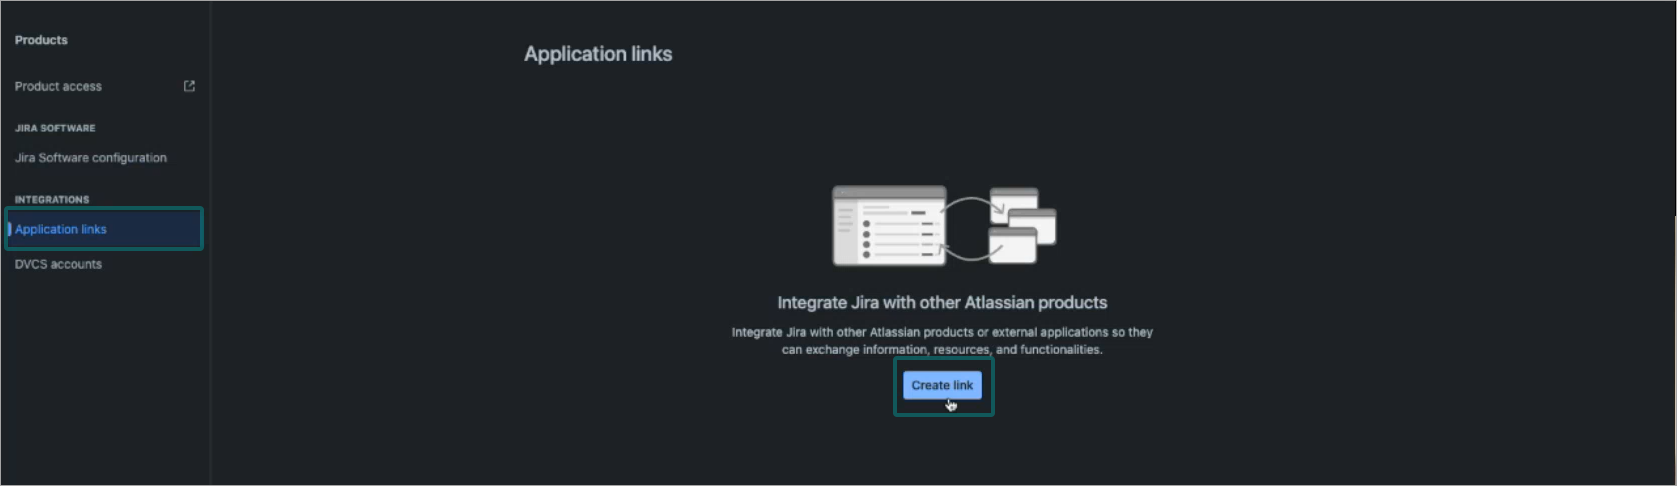 The Create link window is displayed.
https and up to gravityzone.bitdefender.com: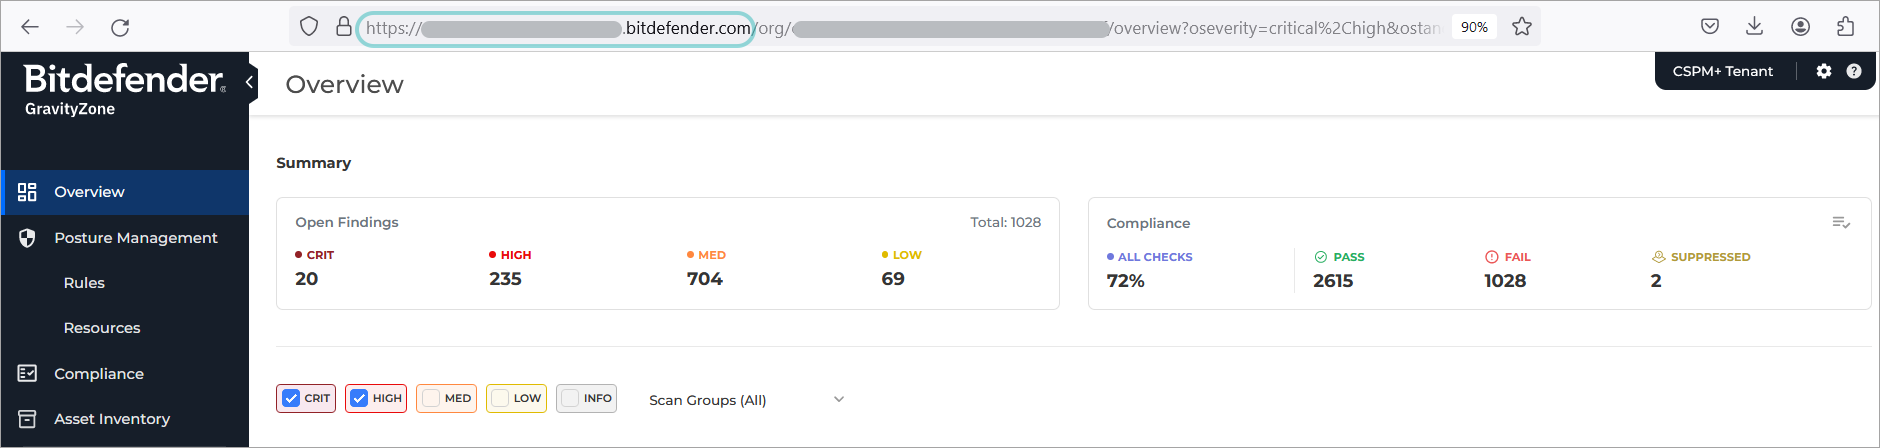
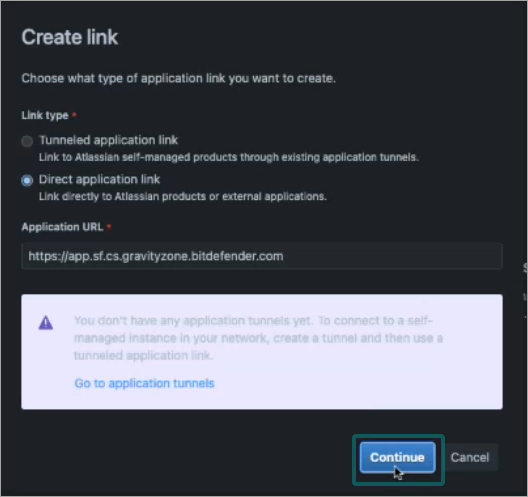
GravityZone Cloud Security.Generic Application.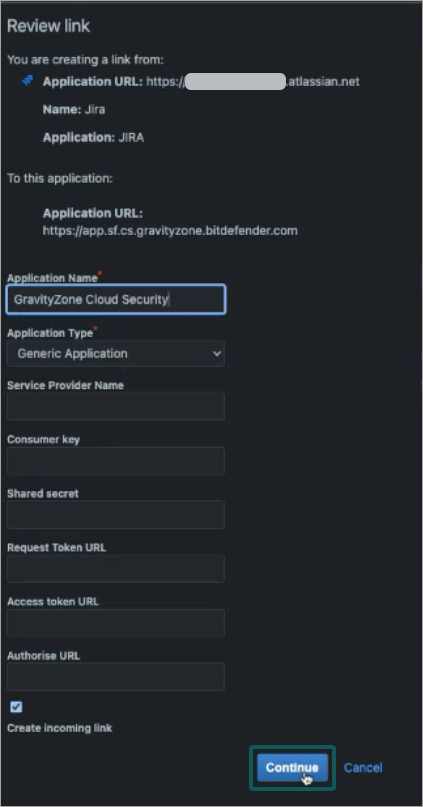 Additional information is displayed under the Review link window.
OauthKey.GravityZone Cloud Security.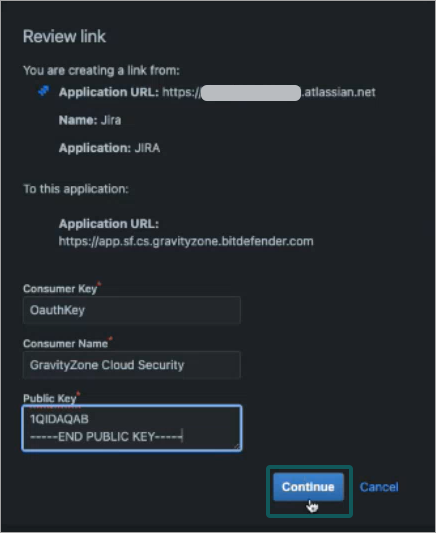 The Application links page is displayed, along with a new entry, if the creation of the entry has been successful.
https and up to atlassian.net: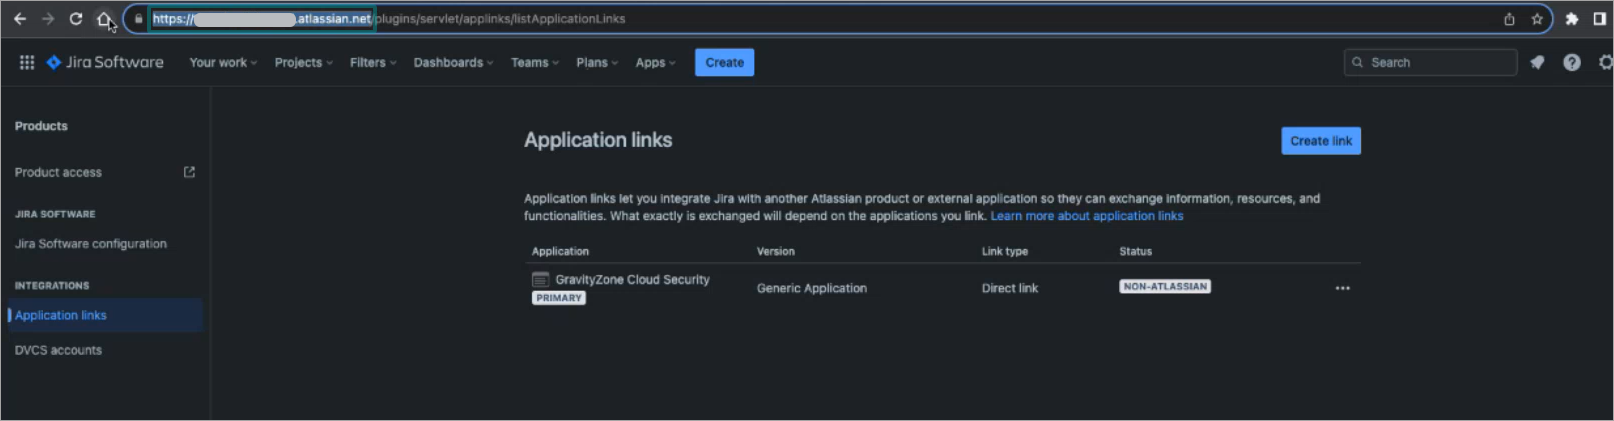
 The Add Jira integration window is displayed.
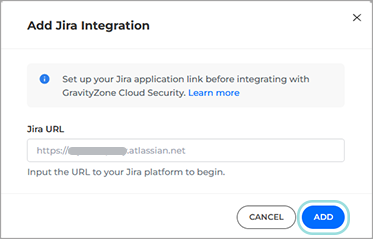 A Welcome to Jira window appears.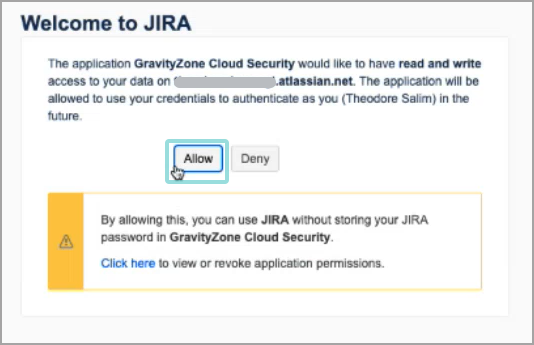
The integration is now complete.
The No connection status is no longer showing under Jira, and today’s date is displayed under the Integration date column.
To automatically generate a Jira ticket from a finding, follow the steps below:
To use this feature you require an active Jira integration.
 button on the upper right side of the panel and select Export issue:
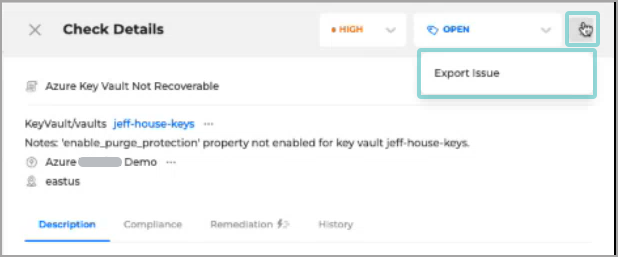 The Export Finding page is displayed.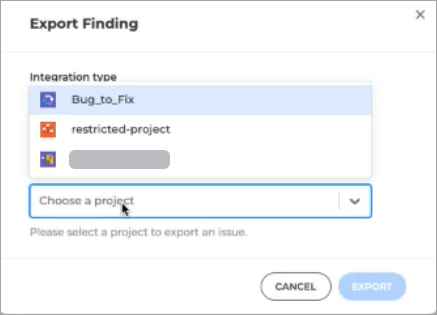
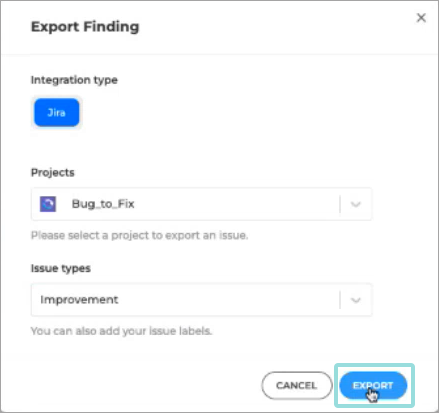
A new Jira ticket containing all the information present in the finiding is created.
Ref :
For EPP/EDR
https://techzone.bitdefender.com/en/tech-papers/gravityzone-best-practices.html
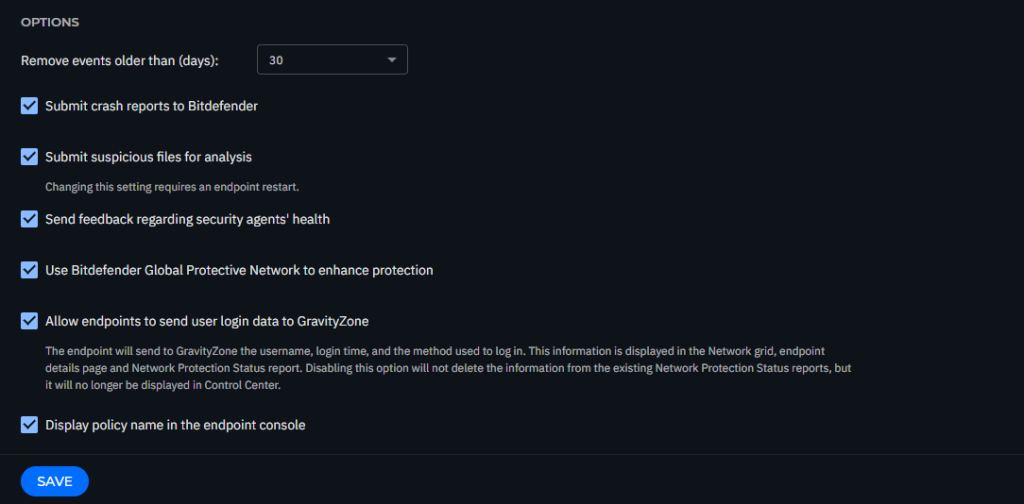
General settings within the policy allow you to manage user interface display options, password protection, proxy settings, power user settings, communication options, and update preferences for the selected endpoints.
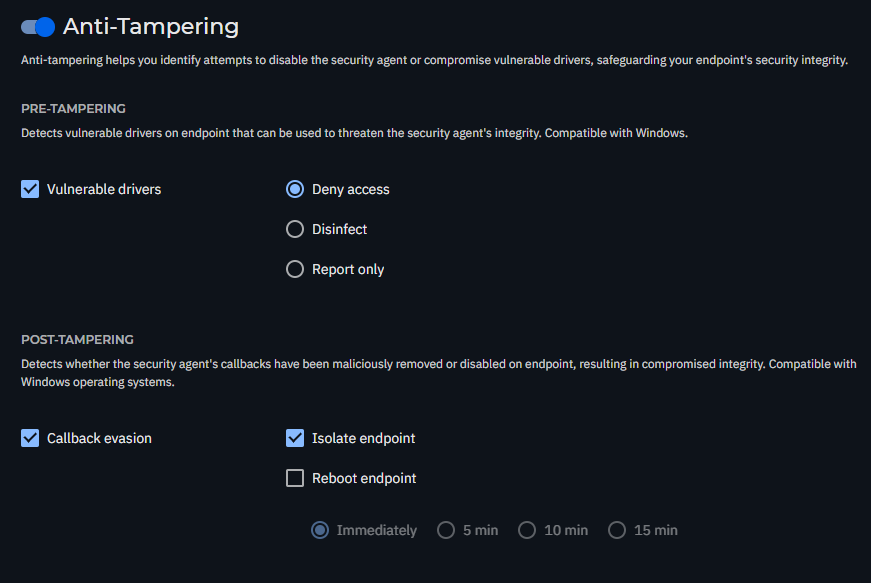
Set uninstall password: This prevents users with administrative rights from unauthorized uninstalling the BEST agent. This uninstall password, however, won’t stop advanced threat actors, who use more advanced tampering techniques. To configure Anti-Tampering protection, navigate here.

Allow endpoints to send user login data to GravityZone: Enable this option to see the logged-in user on their machines within the Network section.
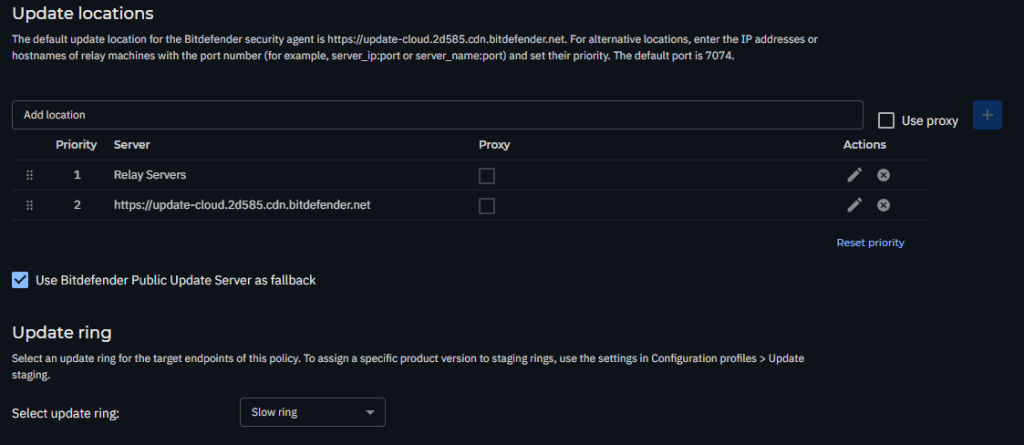
Navigate to the Agent > Update section to configure the BEST agent and security content update settings.
We recommend configuring the following:

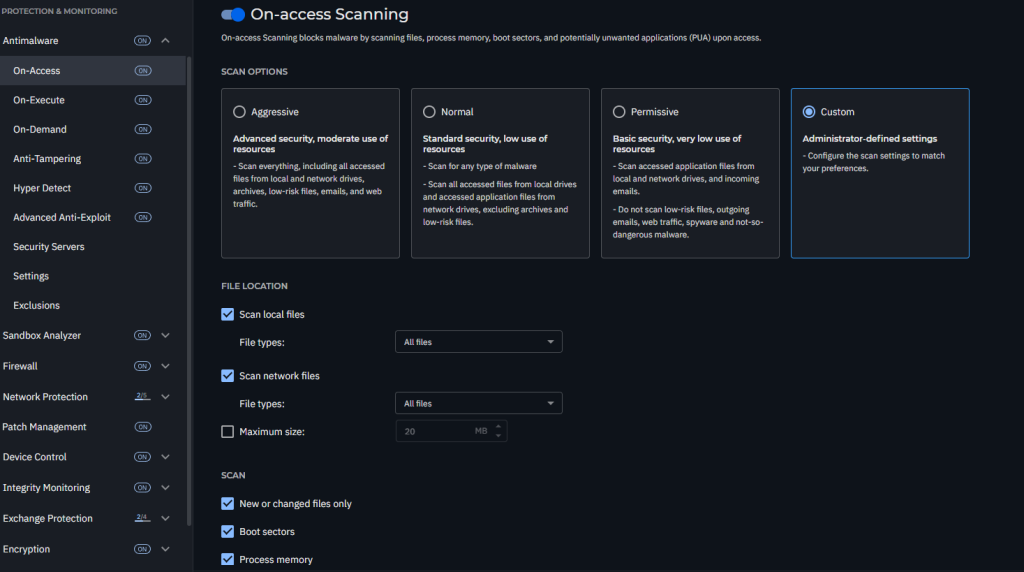
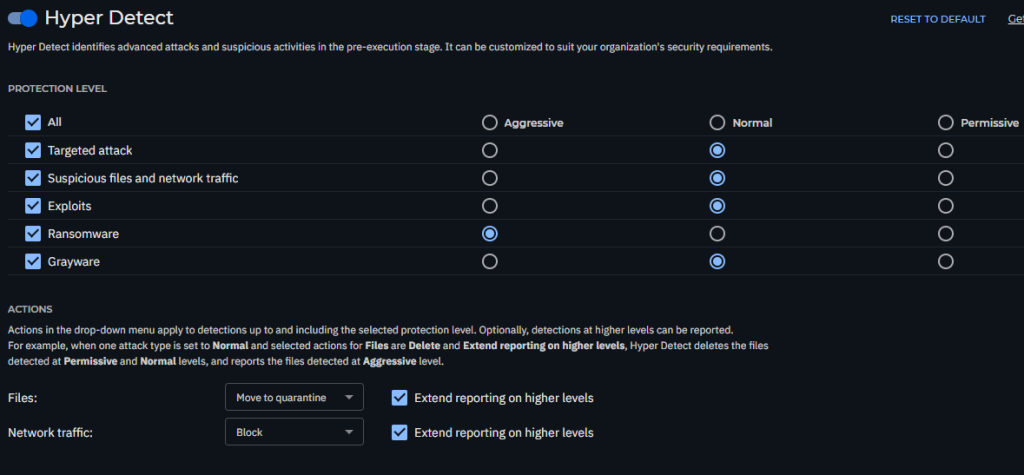
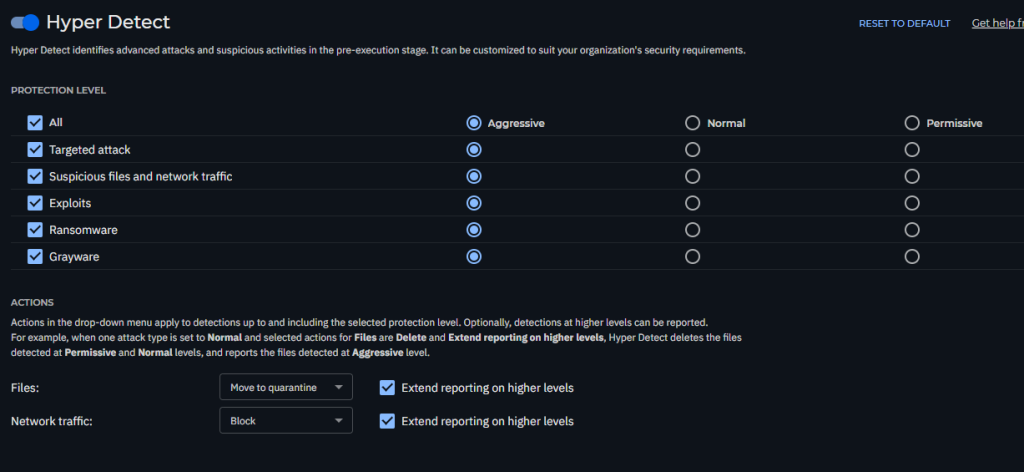
The Antimalware module is the foundation of your BEST, providing a multi-layered defense that proactively protects against a wide range of threats, from traditional malware to advanced, fileless attacks and ransomware. This section details the configuration for key settings, including On-Access, On-Execute, On-Demand, Anti-Tampering, HyperDetect, and Advanced Anti-Exploit.
Malware protection prevents new malware threats from entering the system by scanning local and network files when they are accessed (opened, moved, copied, or executed). Navigate to Antimalware > On-Access to configure antimalware protection.
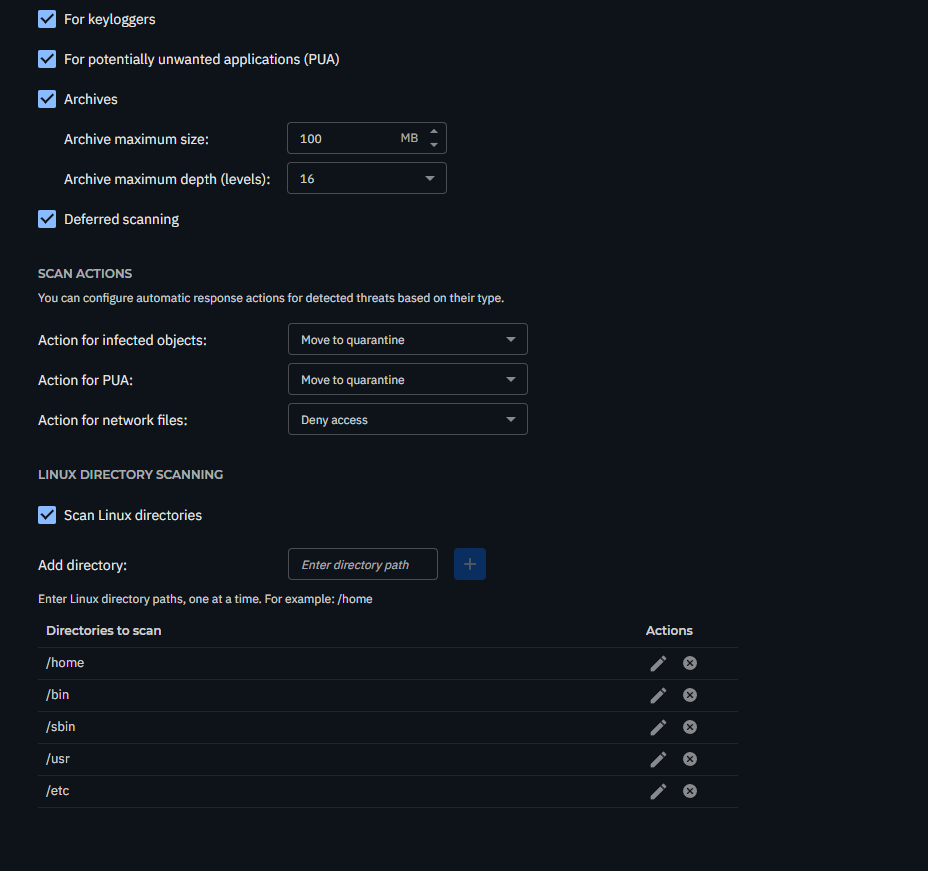
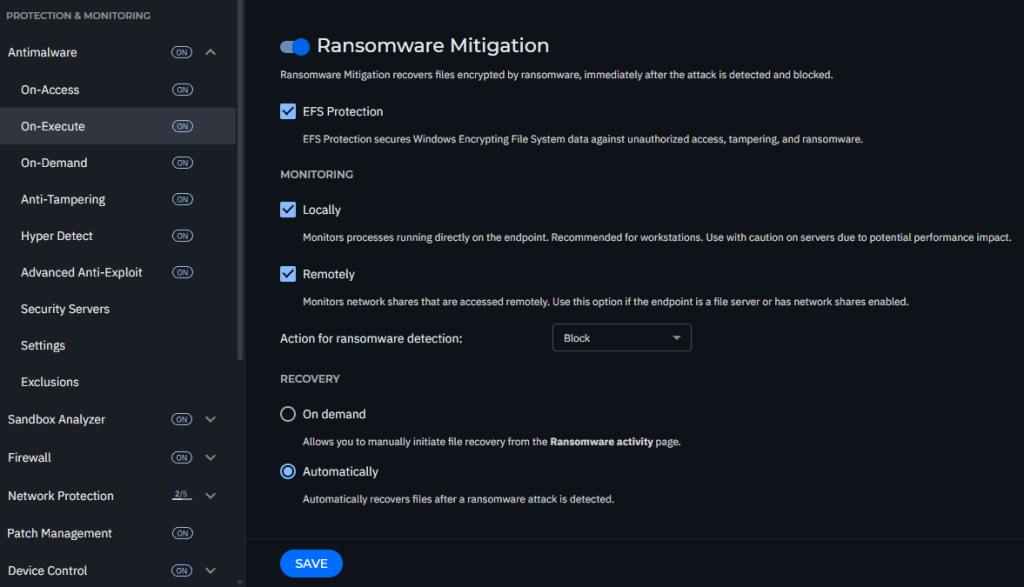
On-Execute Scanning protects against malicious processes during their execution stage. Navigate to Antimalware > On-Execute to configure this layer of protection.
Advanced Threat Control (ATC)
Sensitivity: Set Normal scan sensitivity for workstations and Aggressive for servers.

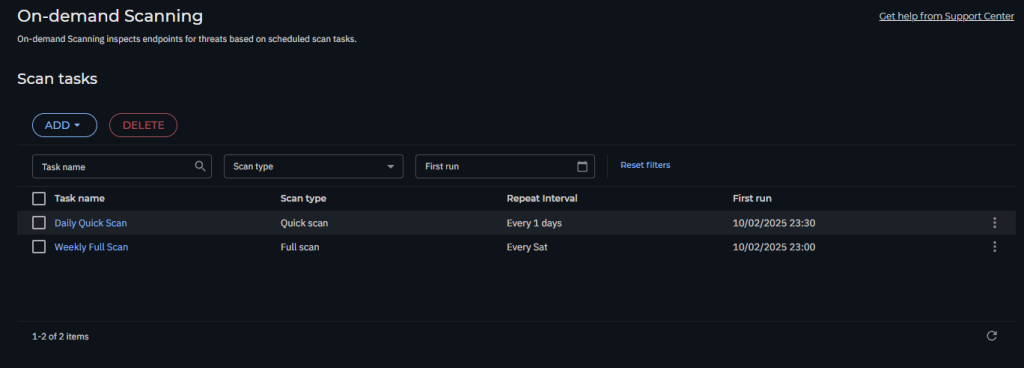
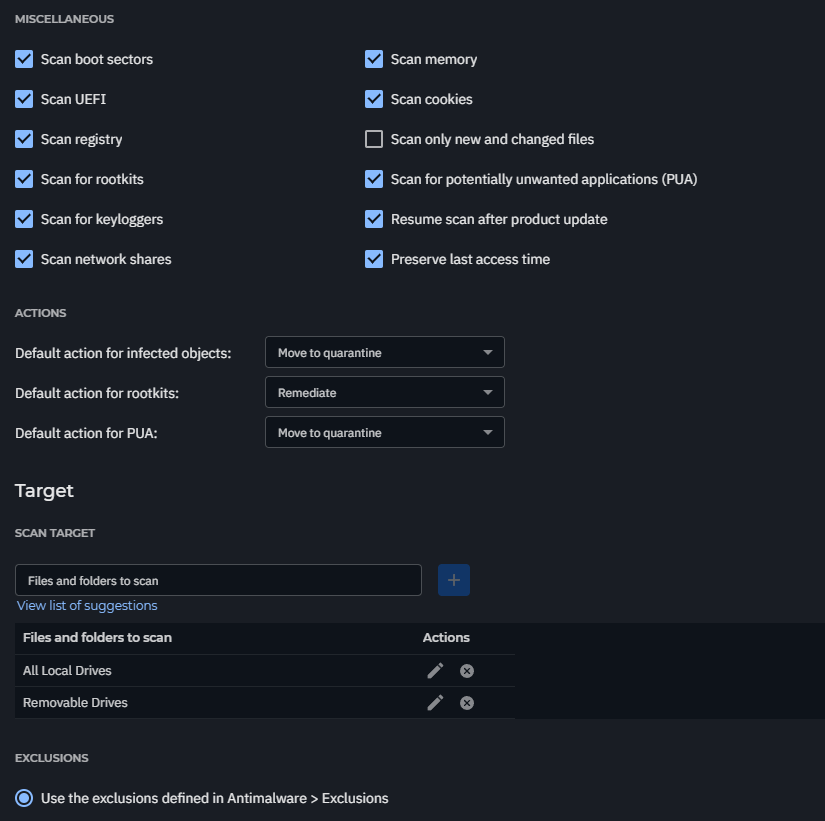
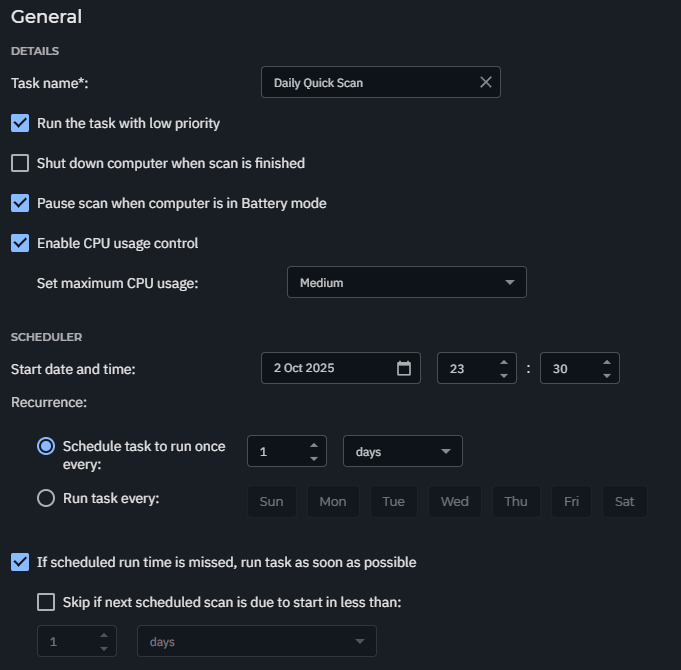
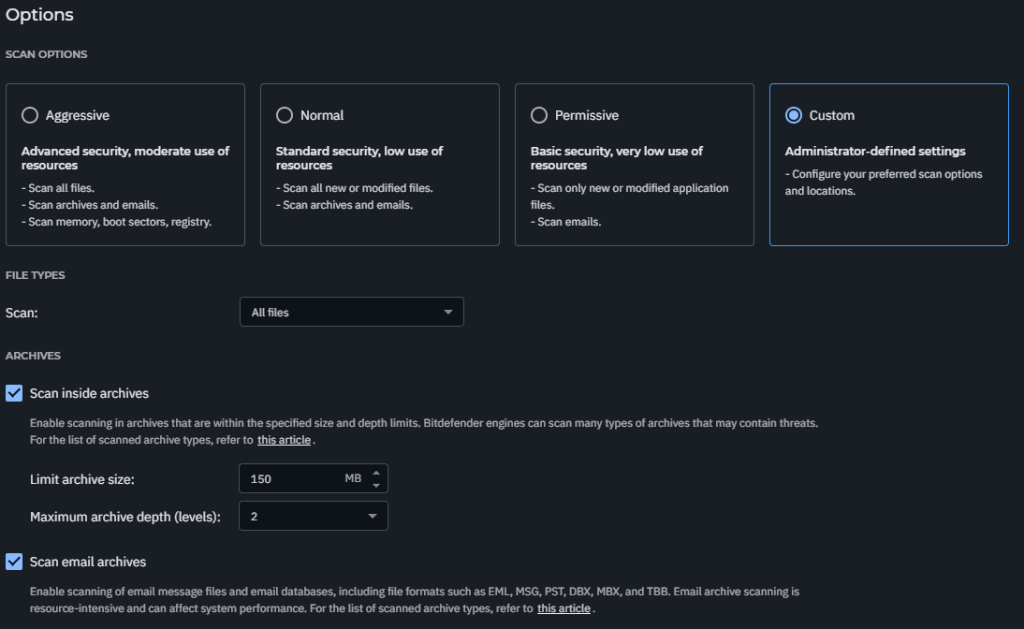
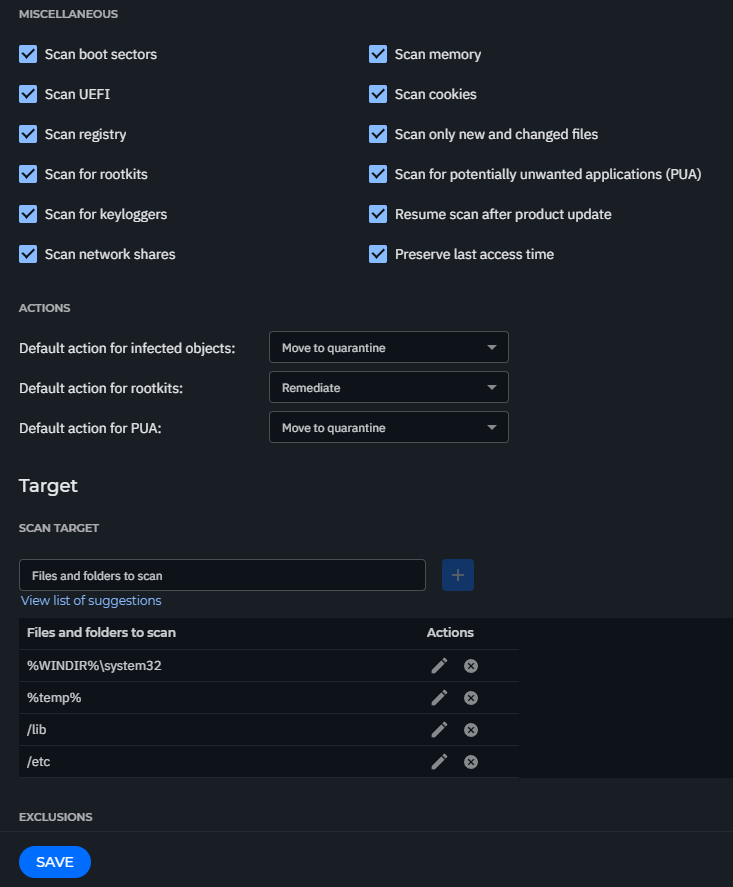
We recommend two types of regular scanning: a weekly full scan and a daily quick scan.
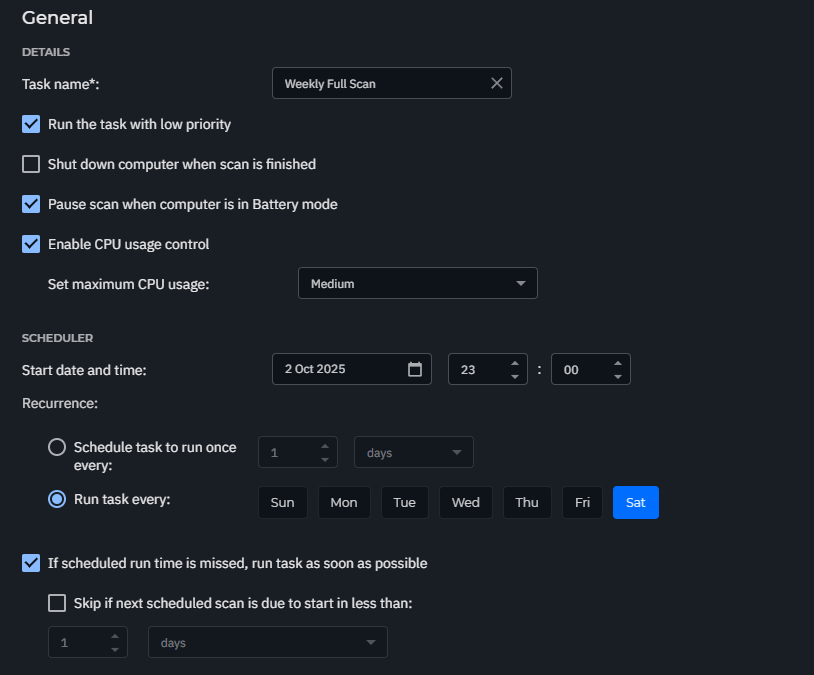
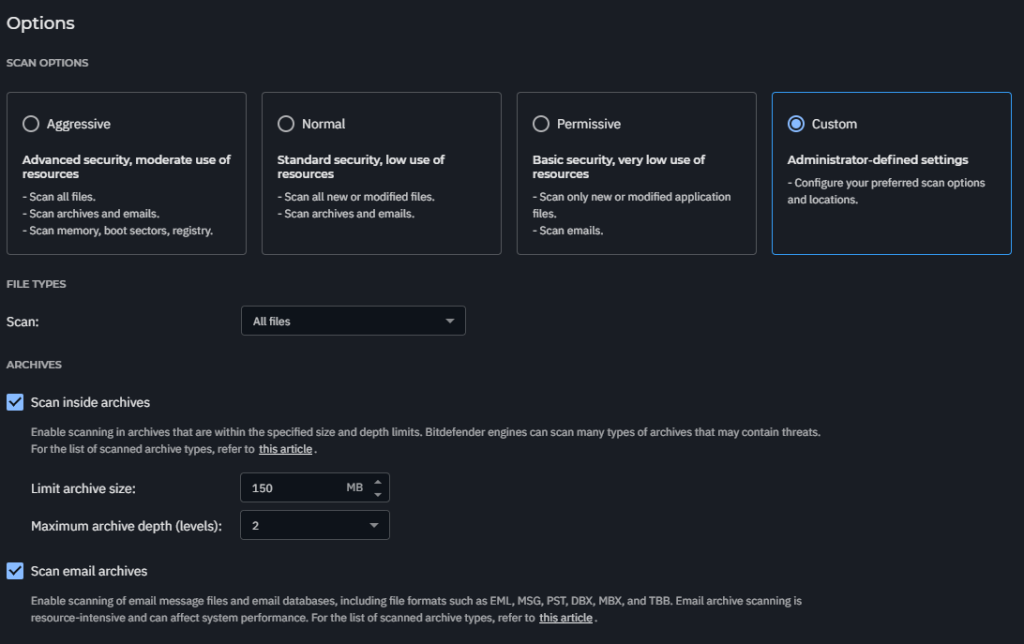
Weekly Full Scan
Daily Quick Scan
For client
For Server
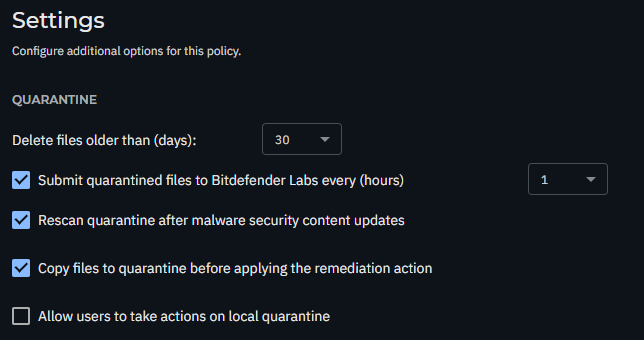
Recommended vendor and product exclusions – Enable this option to use default exclusions provided by Bitdefender for compatibility with common third-party software.

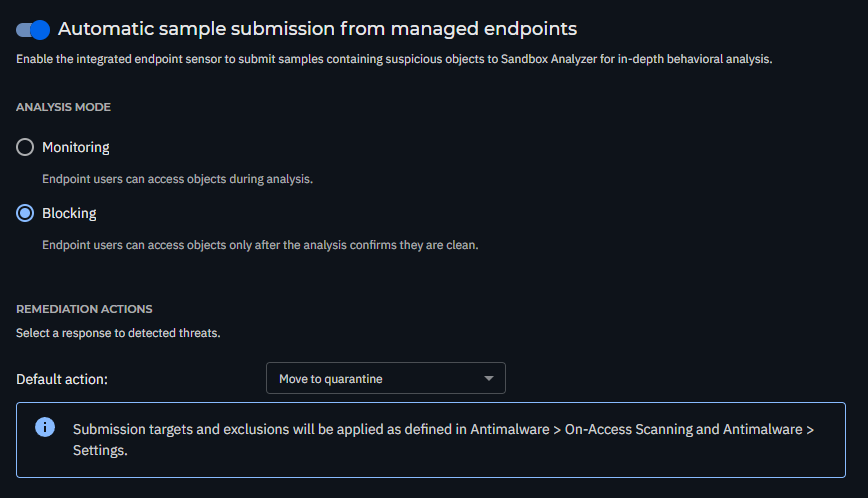
Analysis mode: Blocking: Endpoint Users will have no access to the file until the analysis result is returned to the endpoint from the Sandbox Analyzer.
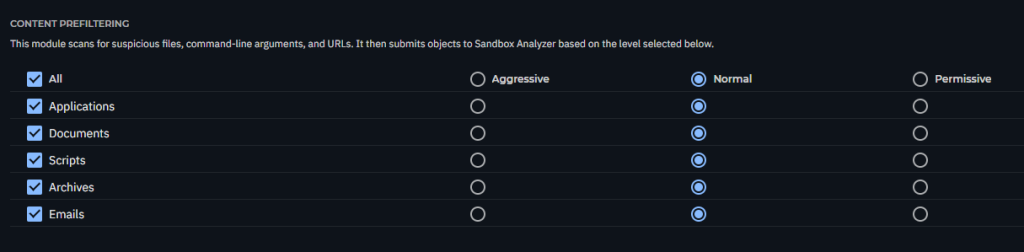
* The Bitdefender MDR Cybersecurity Breach Warranty requires Content Prefiltering settings to be configured in Aggressive mode.
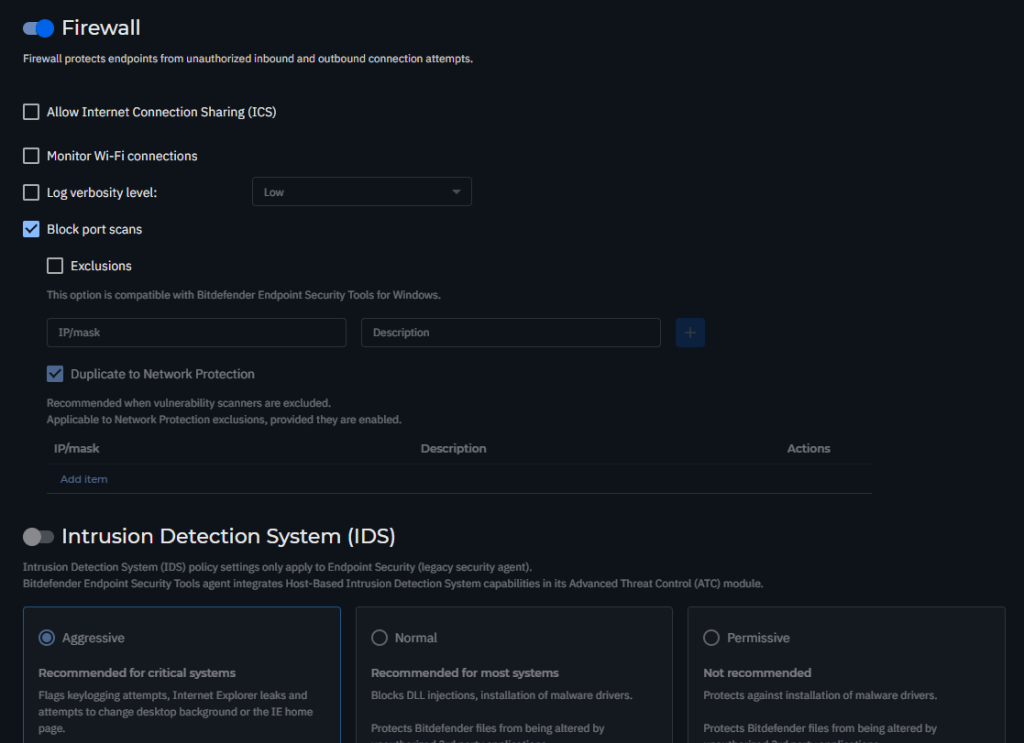
The firewall’s filtering policy depends on the trust level. To apply different profiles to network segments within your company, we recommend applying network profiles to your company’s managed networks in the Networks table:
If a network that is not defined is detected, the Bitdefender security agent identifies the network adapter type and applies a corresponding profile to the connection.
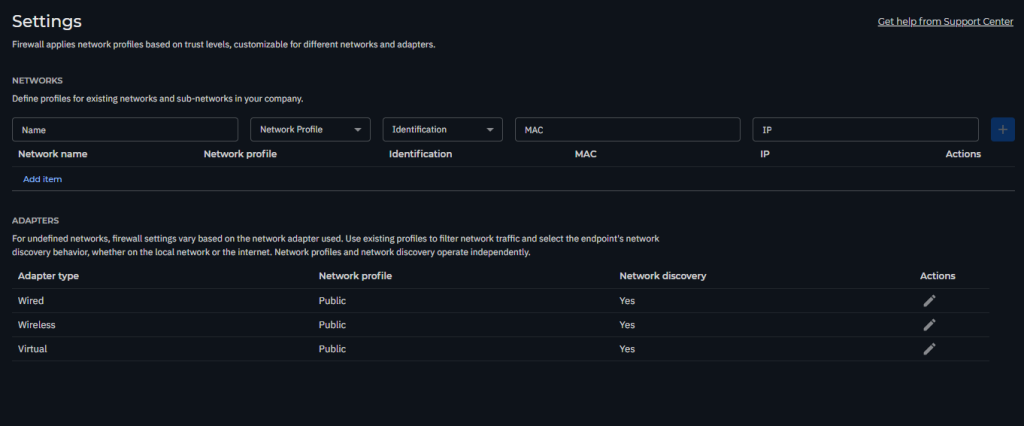
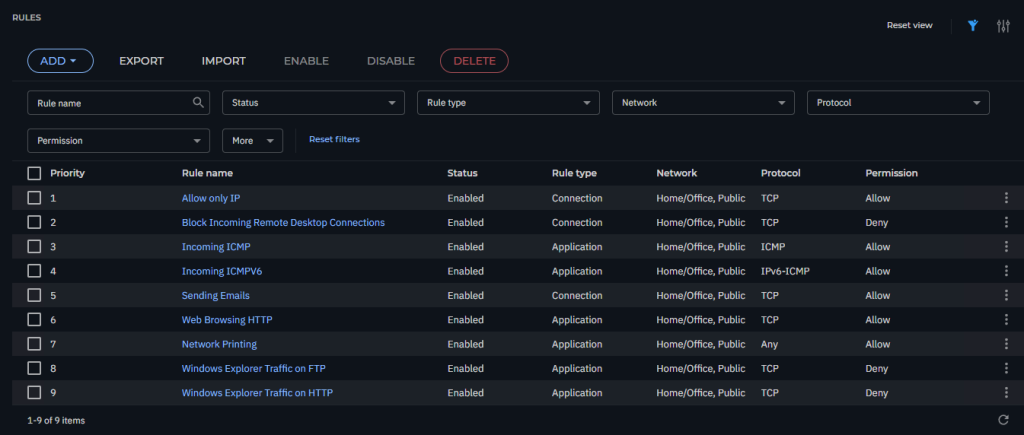
If you are using Network Printing > Please Enabled and Set Permission as Allow (Rules 7)
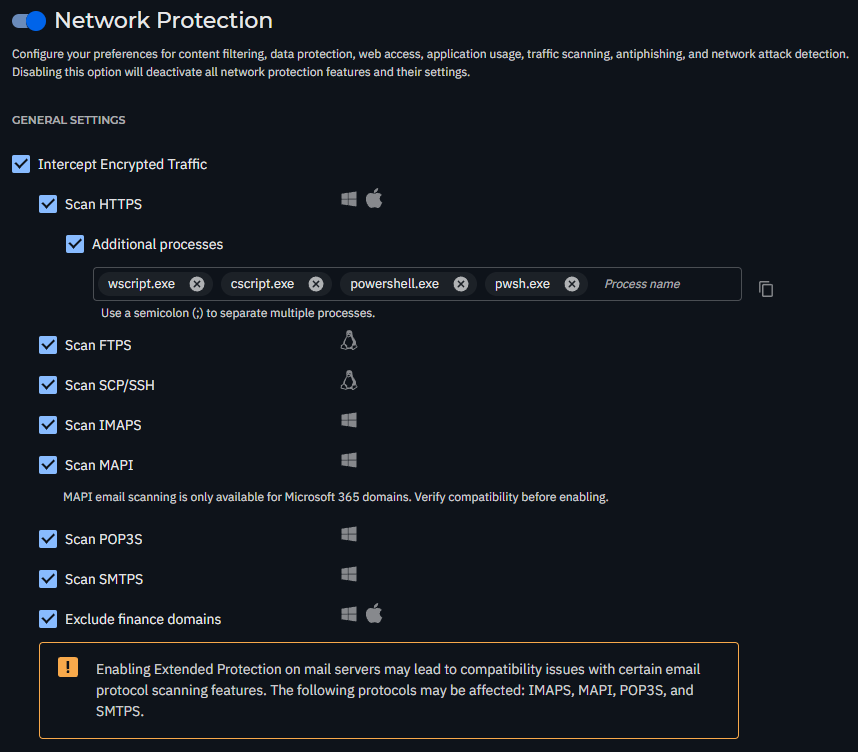
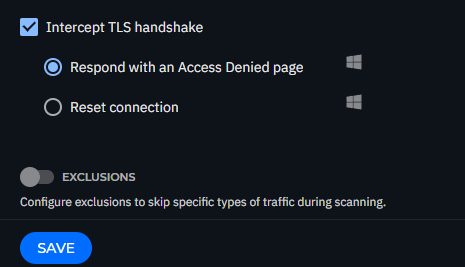
Additional Processes: Add the following processes for scanning: wscript.exe; cscript.exe; powershell.exe; pwsh.exe

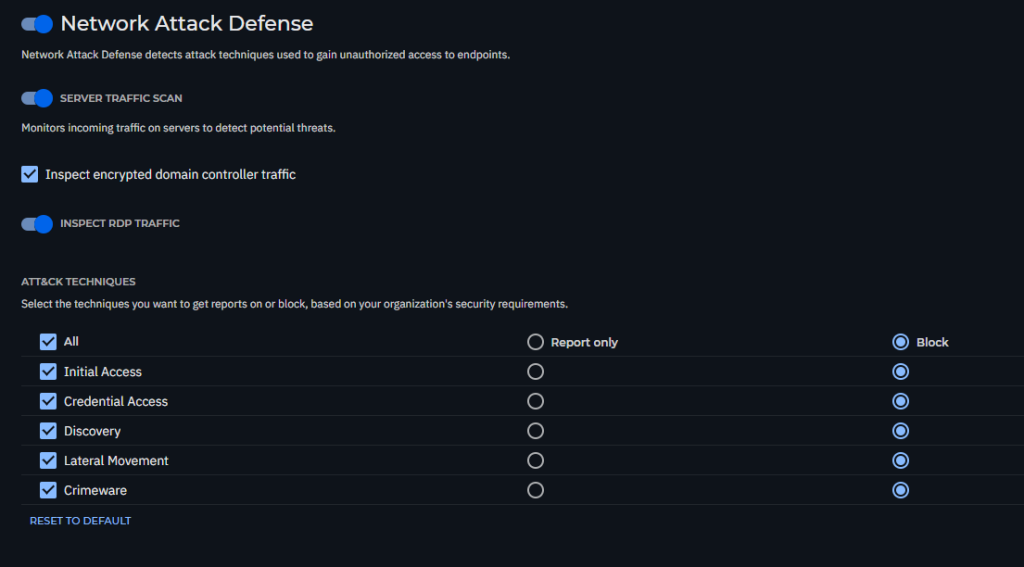
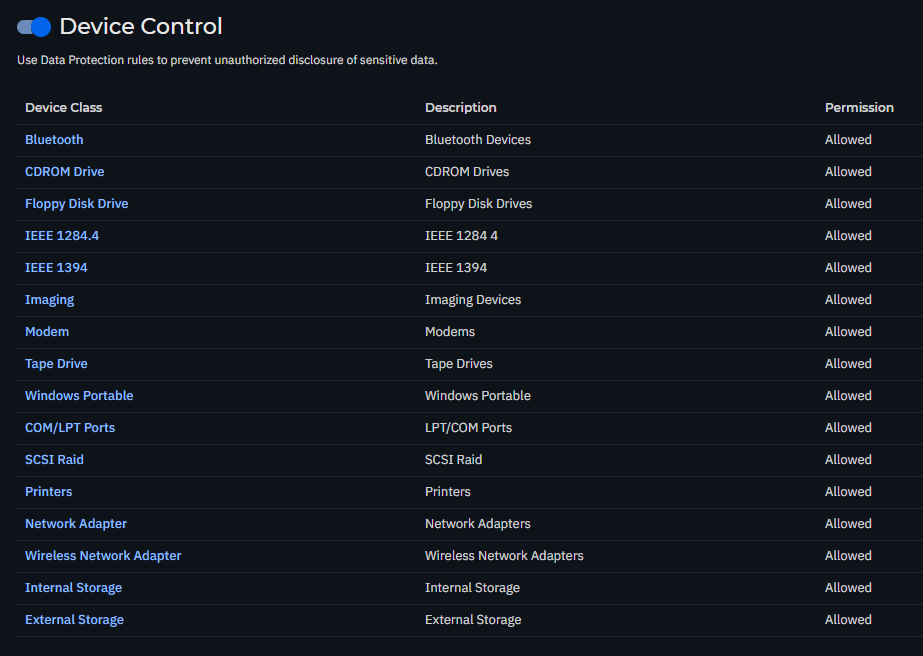
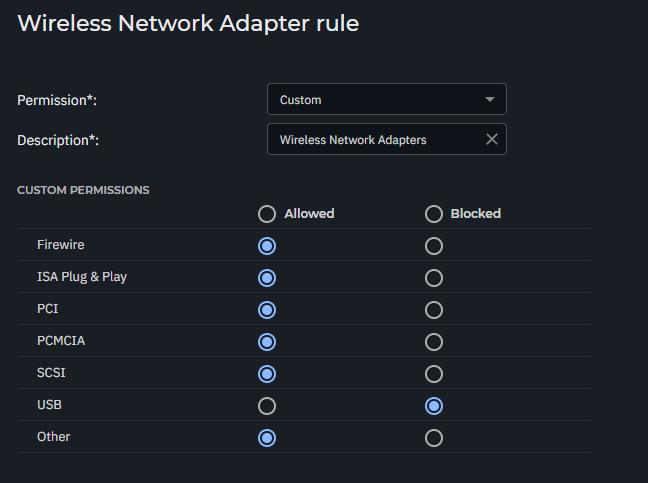
if want to block USB Wifi
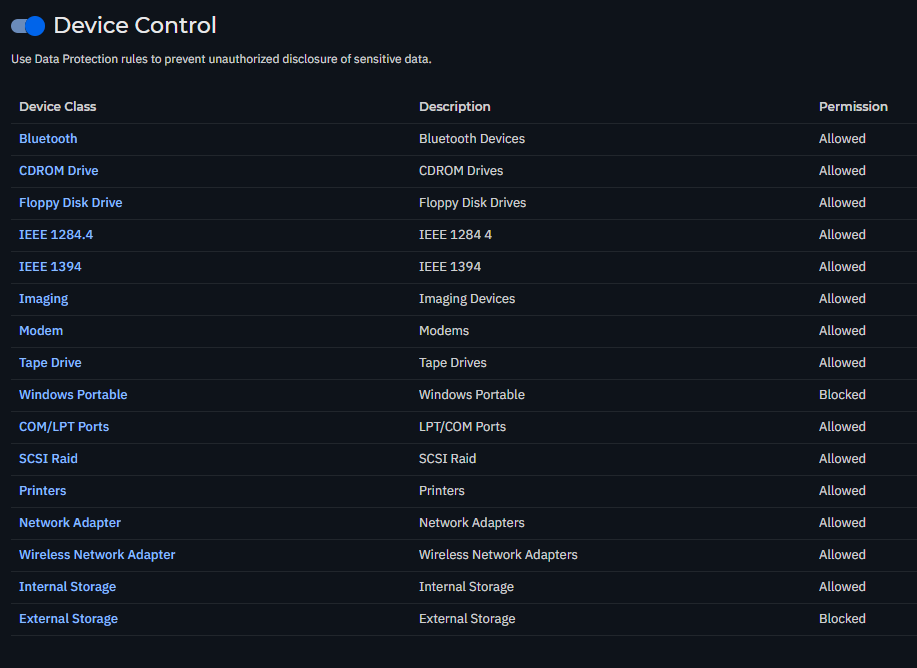
if want to block External Storage
Set Windows Portable and External Storage as Block
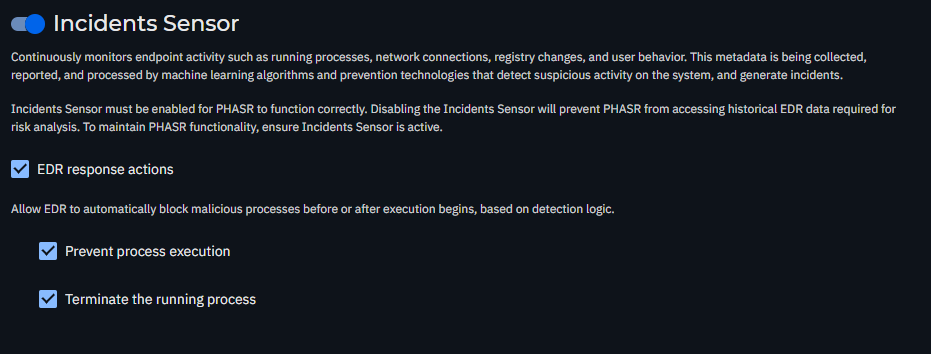
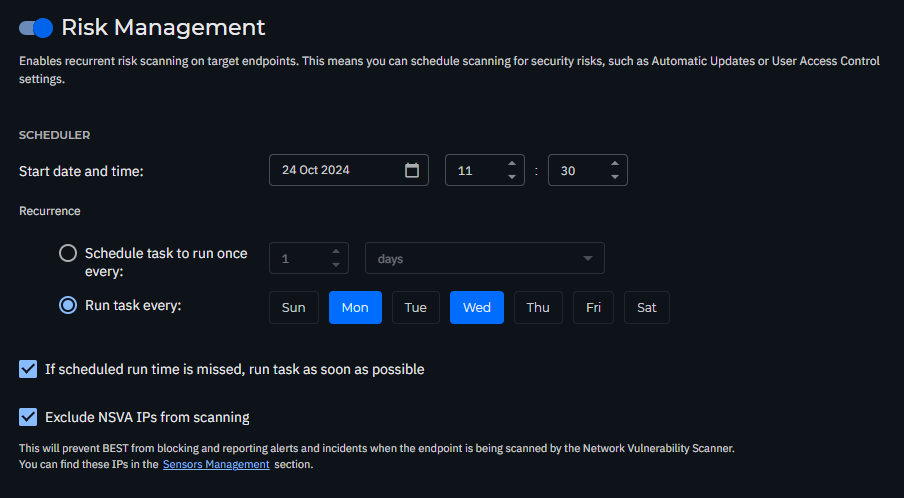
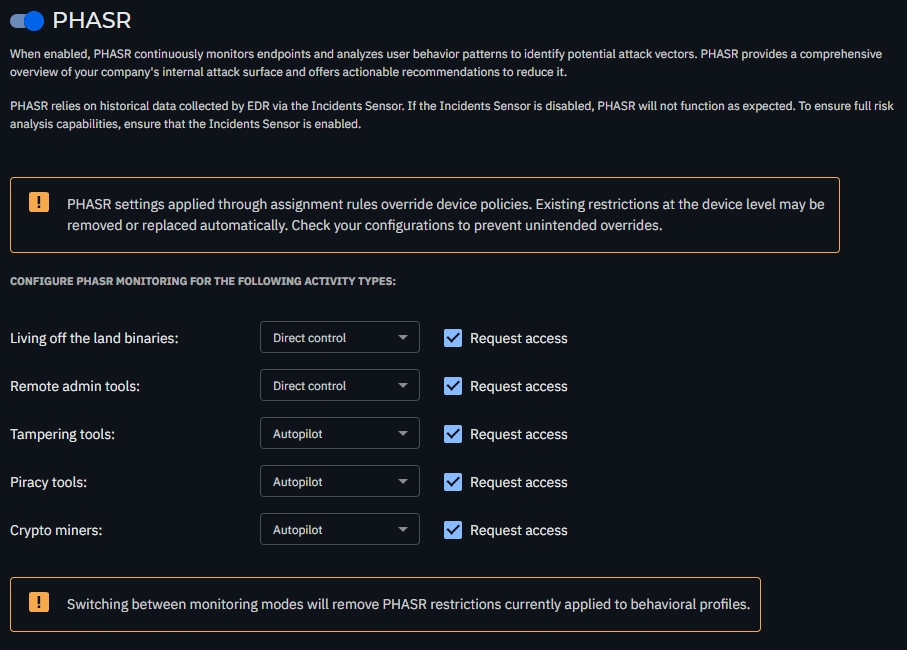

For MDR
1 You need to install License key by go to
My Company > licensing
https://www.bitdefender.com/business/support/en/77209-295101-licensing—provisioning.html
GravityZone Patch Management is
Add-on and pay per endpoints
2 Config installation package to include Patch Management (if not it you need to manual install by each endpoint)

3 Create new maintenance window
https://www.bitdefender.com/business/support/en/77209-376316-patch-management.html
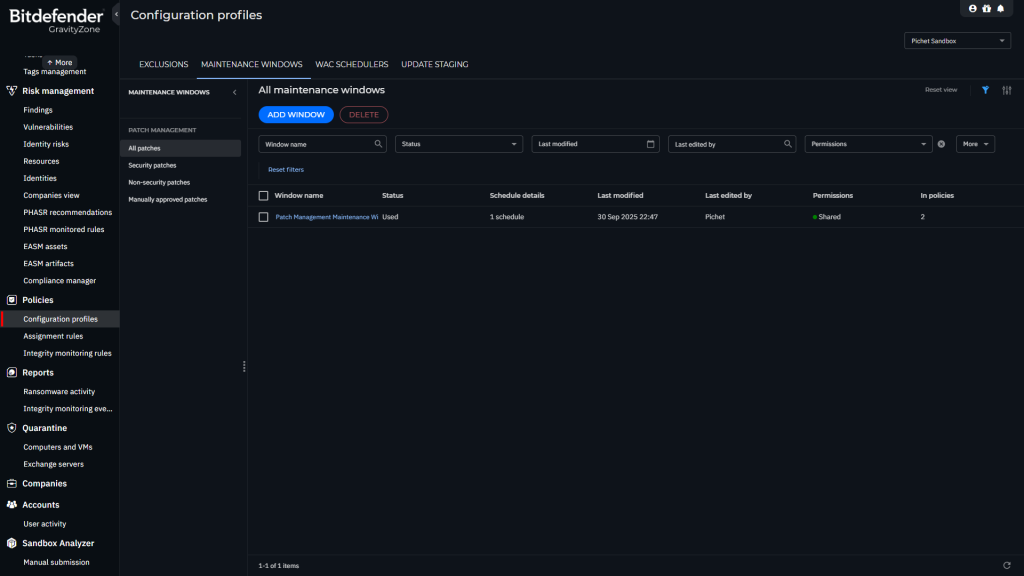
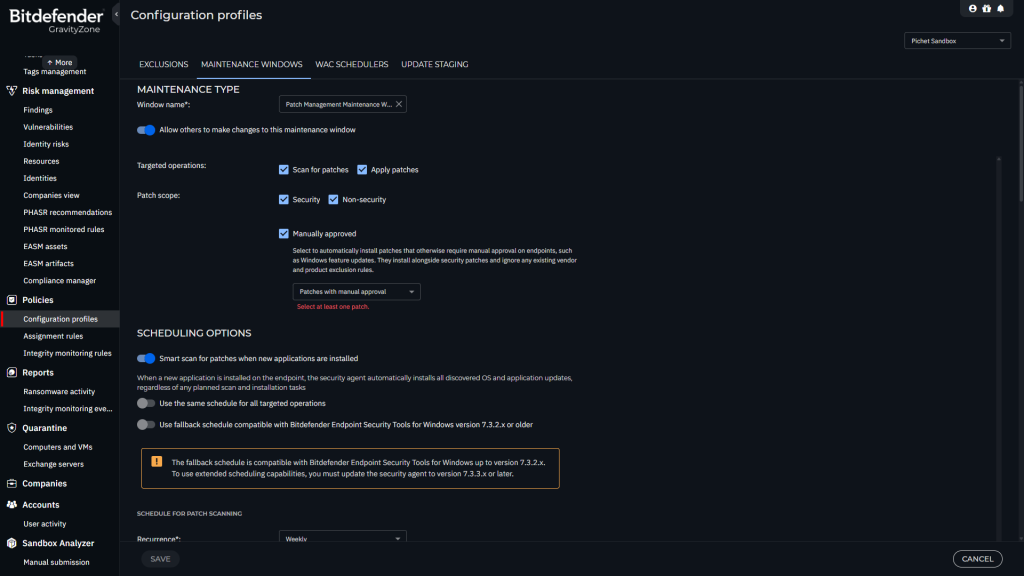
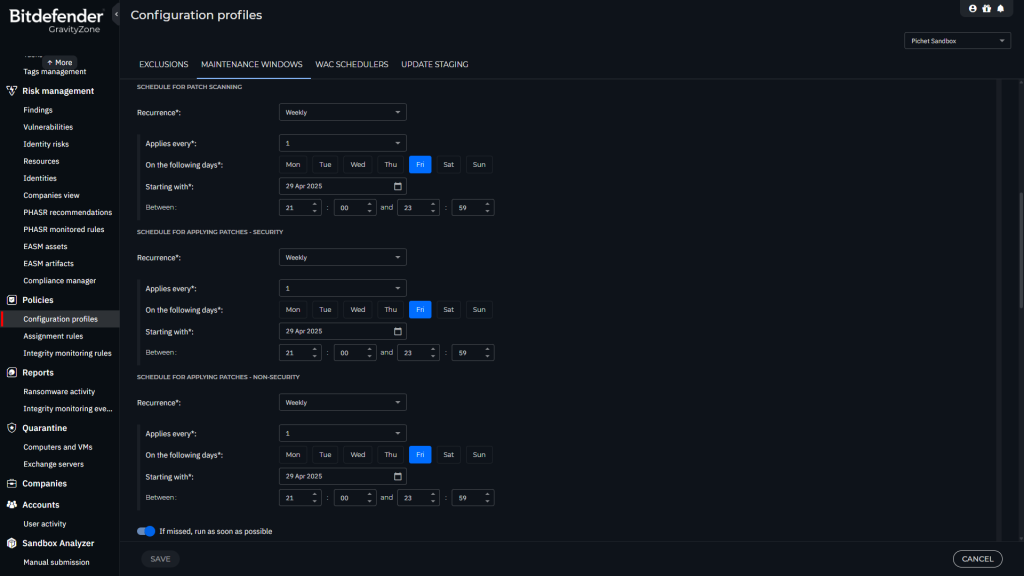
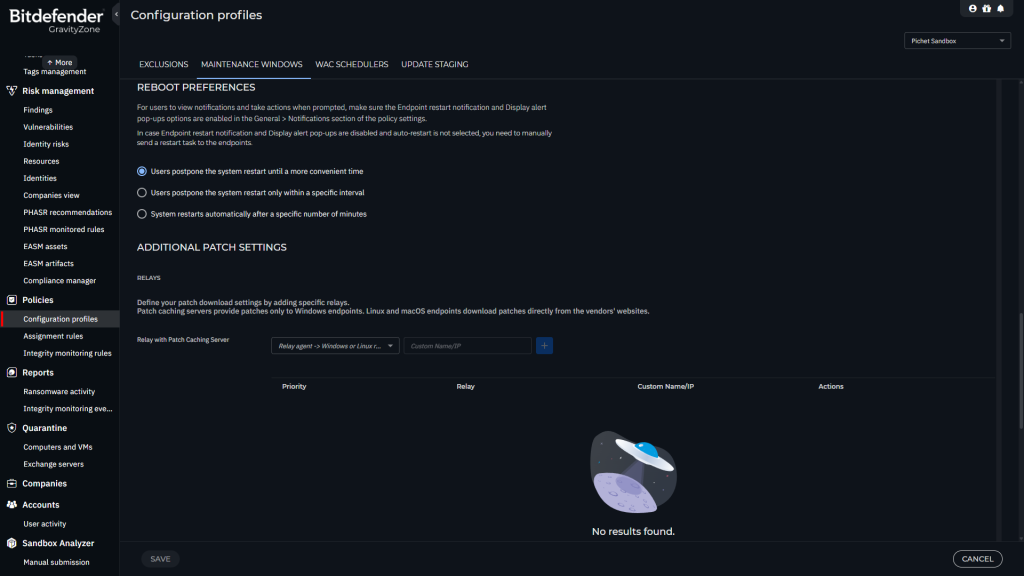
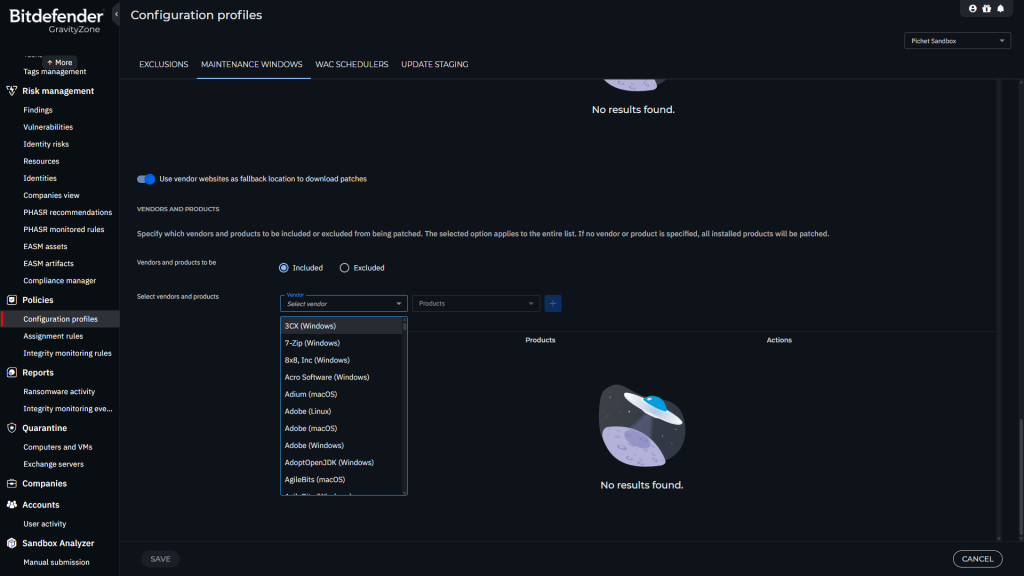
4 Assigning the maintenance window to a policy.
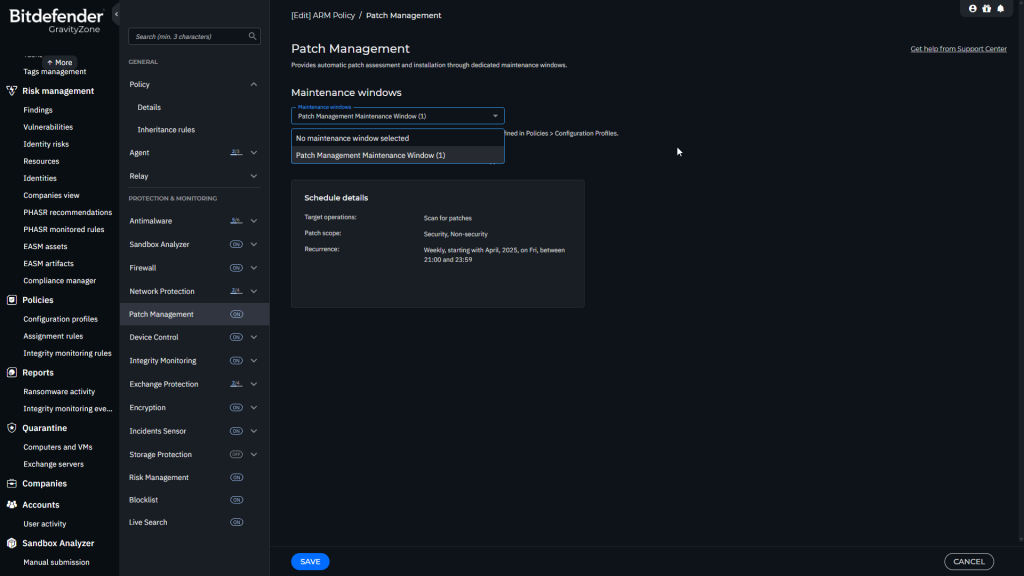
5 Run Patch Scan
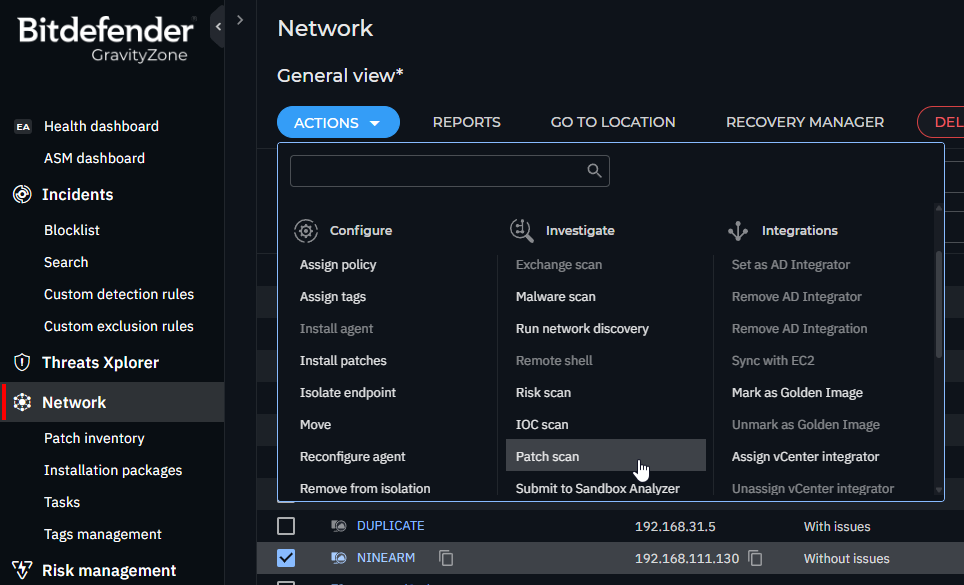
6 Go to Patch Inventory to manage patch
Manually install or uninstall features
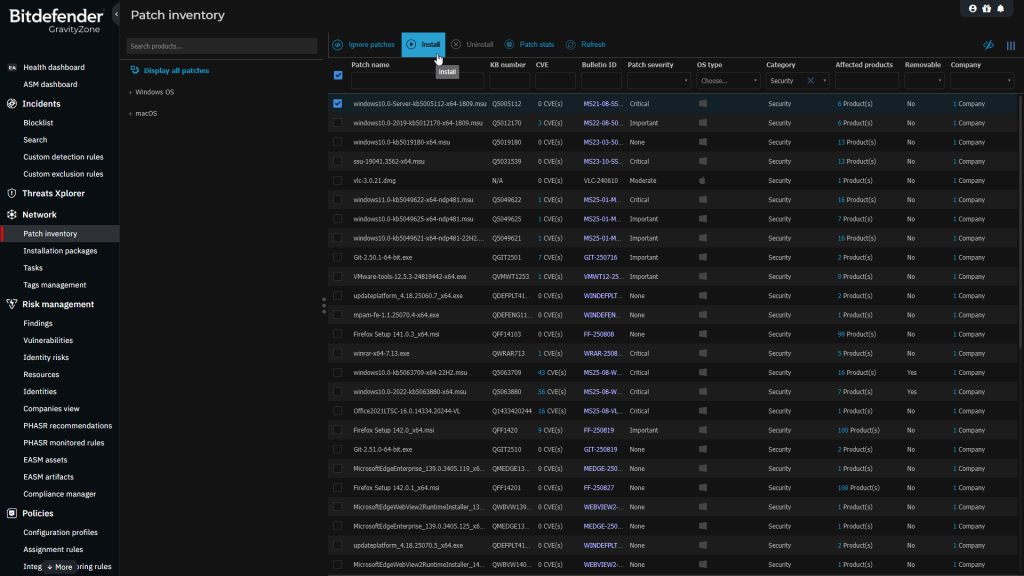
7 Create Report

This article provides comprehensive lists of vendors and products that are compatible with Bitdefender Patch Management for Windows, Linux (CentOS, RedHat, and SUSE), and macOS.
The Patch Management module supports a vast set of software products. In GravityZone Control Center you can view only the software products installed in your network, for which GravityZone provides patches.
The lists of supported vendors and products are available in CSV format, grouped by operating system:
Ref Link :
1: https://www.bitdefender.com/business/support/en/77209-376316-patch-management.html